Hardware Security Modules and Yubikey
Definitions: TPM and HSM
| Acronym | Term | Brief description |
|---|---|---|
| TPM | Trusted Platform Module | Hardware-based security chip |
| HSM | Hardware Security Module | External device, tamper-proof |
The Trusted Platform Module is a security chip that securely stores cryptographic keys and provides functions such as Secure Boot, BitLocker encryption and device identity. It is permanently soldered onto the motherboard of a computer, smartphone, etc.
 A Hardware Security Module HSM, on the other hand, is usually portable and can be connected to various devices. It can not only store keys, but often also perform cryptographic operations (key generation, signing, encryption). HSMs are designed to be highly secure and tamper-proof. They can be externally certified or audited, meaning that even highly sensitive processes such as payment transactions can be carried out.
What happened so far
I listened to a podcast from the Bundesamt für Sicherheit in der Informationstechnik (BSI) on the topic of ‘Passkeys instead of passwords’. Following the recommendations, I bought a hardware security module (HSM) so that I can use passkeys for my services in future. For a long time now, I have been unhappy with my fragmented secret management system consisting of notes, browser plugins, offline password managers such as KeePass, SSH credentials stored on my hard drive, backup keys and emergency codes from various providers.
I’d finally like to bring some order to the situation without tying myself so tightly to a commercial provider that I become dependent on them.
Objectives
- No longer having to remember passwords or login details
- Setting up a system for managing passwords that is as simple as possible, yet secure
- Bringing order to the jumble of accounts
- Organising my digital legacy
- Enabling others to do the same
Welche Erwartung ich jetzt schon einmal nehmen kann: Ganz ohne Passwörter oder Pins geht es auch mit dem HSM nicht. Ein Yubikey ist kein Passwortmanager. Er kann zwar Zertifikate, Passkeys und Secrets für OTPs halten, gibt diese Geheimnisse dann aber nicht mehr preis. Mit seiner Hilfe kann man signieren (Authentizität beweisen), Verschlüsseln und abgeleitete Schlüssel erstellen.
In fact, password management can be centralised and simplified using the Yubikey. Popular password managers support passkeys meaning a master password is no longer required.
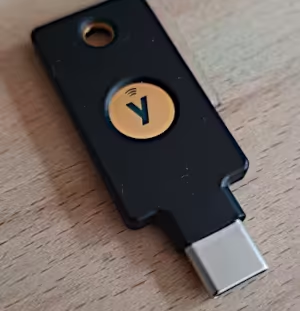
Yubikey
 As an HSM, I use two Yubikey key fobs. One to carry with me at all times and one as a spare, which is kept in a safe place. There are other providers of mobile hardware security modules, such as Nitrokey. I wasn’t aware of them before writing this article. That’s a shame, as their product is open-source and therefore an ideal candidate for testing on my blog 😥.
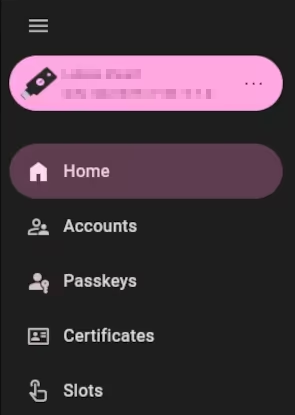
Yubico Authenticator
The Yubikey Authenticator GUI programme is useful for setting up the device, assigning functions to the Slot key (e.g. confirmation or password entry via keyboard simulation) and if you use 2FA one-time passwords, e.g. as TOTP. Furthermore, my Yubikey supports PKI, meaning that SSL certificates and private keys can be stored securely.
Concept of the HSM
Part of the concept is that private keys are either generated directly on the hardware key or - without being permanently stored locally - are created on an end device but stored on the Yubikey. These remain on the key and cannot be exported. It supports common asymmetric methods such as RSA and ECDH. For further details, see this BSI publication on cryptographic methods. Furthermore, the key will be kept offline most of the time, i.e. without a power supply. Thus it is virtually impossible to compromise. An additional PIN as a protective measure in the event of key loss is a further security factor.
Spare key
Nevertheless, you should make a note of which access points you protect using which method, so that the correct accounts can be locked in the event of loss. A ‘spare key’ should be available and set up, which is almost as time-consuming as configuring the main key.
NFC
I’d hoped that my key’s NFC support would make logging in even quicker and easier. However, two things bother me here: I simply cannot get my laptop to recognise the Yubikey via NFC. And on my mobile, NFC recognition works at best flakily. When I hold the key up to it, the app launches and asks me to enter the PIN. If I do so, I have to remove the key and hold it up to the sensor again (‘Do not move the key!’). This doesn’t work every time by a long shot and seems rather prone to glitches overall. A pity.

What I find myself missing when using the Yubikey
Overall, I do miss a few convenience features in my day-to-day use of the Yubikey. When I click on the desired keys or accounts, nothing happens. And it seems I can’t configure anything there either.
When using passkeys, I’d like to see a shortcut. Clicking on the relevant key in the authenticator should open the corresponding app or browser window with the target website. Since I’ve already unlocked the HSM with the PIN at this point, the login process can even take place fully automatically once the key is tapped.
I’d like to see something similar when managing accounts. Why is the module called ‘Accounts’ if I can’t access them directly? Here, too, I have to open the relevant web apps etc. myself, have the password manager ready, and then copy the 2FA codes from the authenticator. There must be an easier way.
Touch, password, PIN, PUK, management key, passphrase
Depending on the module, multi-factor authentication is usually required even when using the Yubikey. The simplest method is presence detection via a touch of the dongle. This ensures that a person is actively operating the HSM and cannot, for example, be logged in automatically. Touch can be used across modules; for detailed configuration, see my article on SSH/PGP.
The Accounts module can optionally be secured with a password, whilst the Passkeys module is secured via PIN. Some providers even require a PIN to be set up as a second factor.
The Certificates module must be protected against unauthorised access using PIN, PUK and management key. Private keys or certificates can optionally be protected with a passphrase, which locks the keys themselves (and, in my view, makes no sense for the Yubikey, as the private keys cannot be read anyway).
Feature set and cryptographic landscape
Since the HSM promises such a significant security boost, I naturally want to make use of as many of its capabilities as possible. I’ve been playing around with the various modules for a few weeks now and have found that you really need to get your head around them and learn a lot to be able to use them all effectively. At least, once you’ve done so, you’ll have a rough idea of what the modules do and gain a good overview of internet security, encryption methods and protocols.
“Accounts” and “Passkeys” are easy to set up for input forms (platforms, websites, shops) and apps (email clients, password managers, messengers): Highly recommended! - schallbert
| Yubikey module | Description |
|---|---|
| Accounts | Management of accounts/logins, supports TOTP |
| Passkeys | Passwordless login procedure via FIDO/WebAuthn (public key credential) |
| Certificates | Storage and use of certificates; supports OpenPGP (PGP) and X.509 (PIV) |
| Slots | Two programmable slots for generating static passwords or one-time passwords |
In my opinion, things get complicated and time-consuming with public/private keys and certificates. Generation and validation procedures depend on the operating system or the programmes available on it, and instructions are sometimes insufficient or contradictory: only for nerds or professionals. - schallbert
Let’s go through the modules.
Two-factor authentication: “Yubikey: Accounts”
The Yubikey can be used as a generator for time-based one-time passwords. To do this, as with any other authenticator app, you create an account for each service and transfer a security key (secret) to the Yubikey. Once the HSM is connected, one-time codes can now be generated based on this secret.
As there is no way to export these secrets from the Yubikey, the process must be repeated for secondary keys. However, not every provider supports the use of multiple authenticators. So it may be sensible to keep the secret in the clipboard1 and reuse it when configuring the secondary key(s).
Passkeys ‘Yubikey: Passkeys’
The Passkey module on my Yubikey works quite well. Unfortunately, many services2 do not yet support passwordless login or only accept Passkeys as a second factor. With other services3, I cannot disable the password, so I see little security benefit, or I am issued with backup codes that are intended to serve as a second factor in an emergency4. At least, I can now bypass the password-TOTP process for some services and log in more quickly.
‘The biggest advantages of the technology for users are, on the one hand, that in future they will no longer have to create and manage passwords. On the other hand, passkeys are immune to the vast majority of known phishing attacks.’ - BSI website, 2025 October
You do not need the Authenticator app to configure passkeys. This is done entirely within the browser or the command line. Both must support the handling of passkeys.
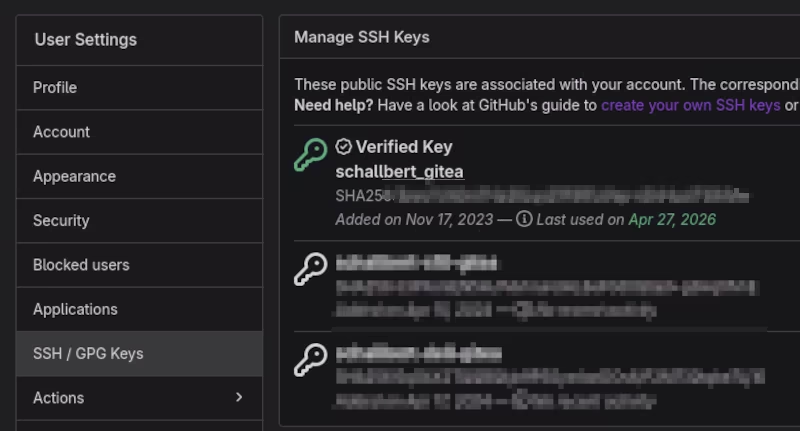
Keys & Certificates ‘Yubikey: Certificates’
To shed some light on this, we first need to understand the difference between a key pair and a certificate in the context of authentication. In both cases, the aim is to verify the client’s identity. This may be done with a server (e.g. via SSH), an institution (e.g. a Certificate Authority) or another client (e.g. via PGP). This allows the destination to confirm that the client attempting to connect is indeed authorised to do so.
Public/Private Key Pair
A key pair alone (i.e. without a certificate) is typically used when the communication destination is controlled by the same party as the client. In such cases, the client can place the public key on the host to establish the connection. This method is used, when setting up SSH connections and for certain APIs, such as Google Search Console.
The host can send a test message to the cient encrypted with the public key, which can only be converted back into plain text using the corresponding private key. If the client sends the correct plain text back to the host, this proves to the host that the connection partner is authentic.
Certificates / PIV
But what if the host is not under the client’s control? How can we then ensure that neither the client nor the server is impersonating someone else and has stored a forged public key? This is precisely where certificates are used.
Put simply, the certificate contains not only the public key but also additional information about the network participant and the desired connection. Now a trusted third party, uninvolved in the communication between client and server, comes into play. In the Private Key Infrastructure PKI, this is known as the Certificate Authority CA.
The network participant now sends the public key, together with metadata about themselves, to the CA and submits a so-called CSR, a Certificate Signing Request. The CA then verifies whether the participant’s channel actually belongs to them.
In the case of an email (keyword PGP/GPG), the CA can, for example, send an individual hash link - derived from the requestor’s public key - to the specified email address. If the link is clicked, this proves to the CA that the email address actually belongs to the client, and the CA can then issue the certificate, i.e. sign the CSR with its private key.
For domains (keyword SSL/TLS), the CA can check with the Domain Name Service provider whether the details match the server’s request.
Clients have the signatures of common Certificate Authorities stored (e.g. in the browser). If the certificate is tampered with on the return journey between server and client, its hash value changes and the client displays a certificate warning: ‘invalid certificate’. However, one must now trust the Certificate Authorities5 🙃
-
The computer should be offline for this. If you want to be extra secure, carry out the pairing on a live operating system. This usually boots from a USB stick and forgets everything after shutdown. ↩
-
E.g. Not at all: Mailbox; 2FA: Discord and Kraken, as of 2026 April. But perhaps I haven’t found the right settings? ↩
-
E.g. Google, GitHub and Hetzner, as of 2026 April. ↩
-
These backup codes must also be stored securely. Ideally offline again, but definitely independently of the HSM. ↩
-
There are alternatives to institutions such as CAs; see Web of Trust. For example, identity verification can also take place peer-to-peer via uninvolved third parties. ↩