
1 year CNC 🎂
Contents
One year with ‘Zerspanobert’ portal milling CNC machine#
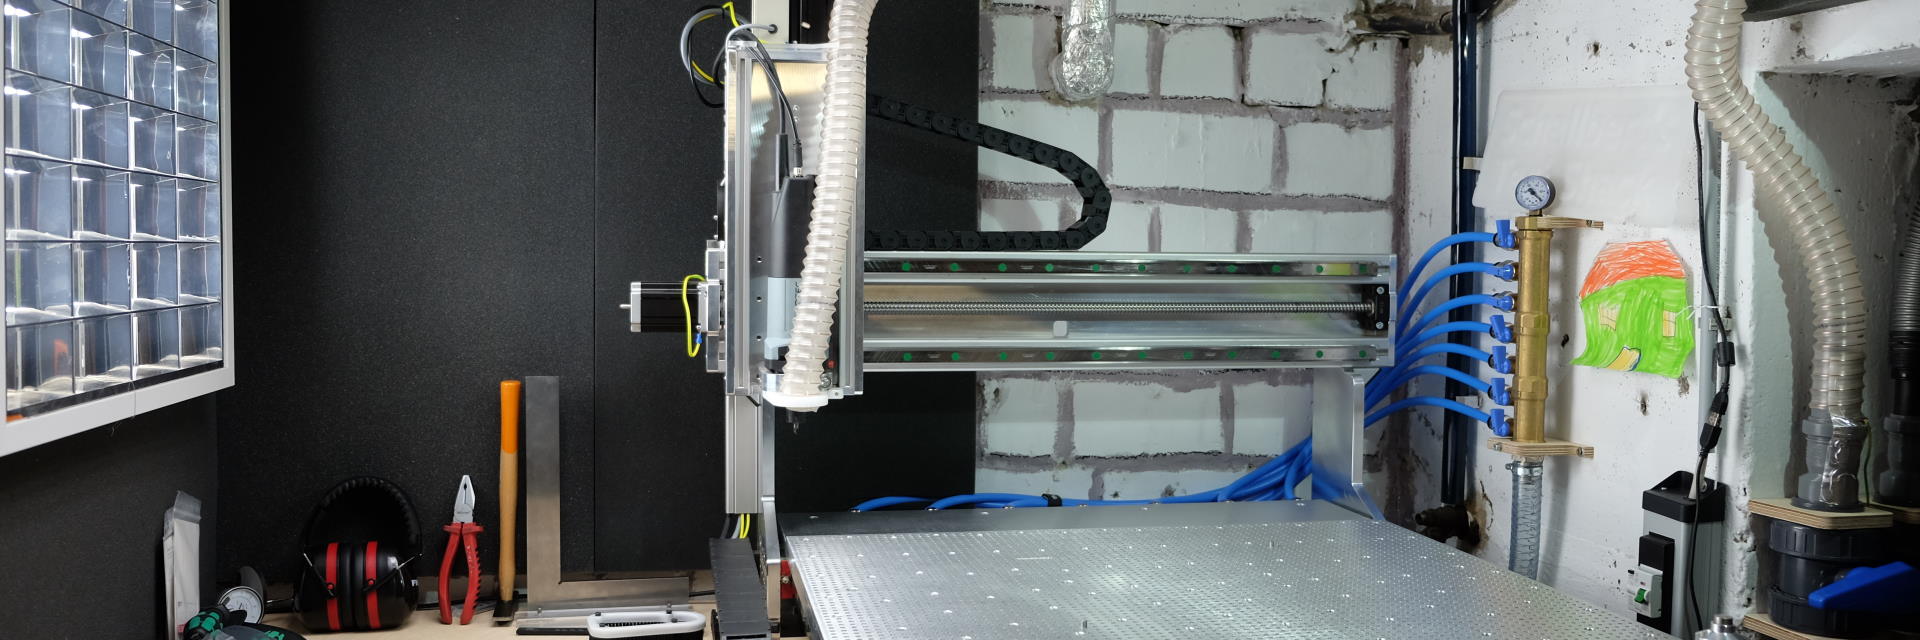
It’s March 2023, and I’m hitting a year of operation with my CNC machine. It was a good year. I definitely learned a lot and had quite some fun writing articles about my progress. Of course, I wasn’t able to document and blog about each and every project that I ran during that period, so take this article as a retrospect summary of the year.
The machine#
With 12 months of experience, I can say that I selected the right machine. It is Sorotec’s second-cheapest one, featuring a lot of stuff that more advanced portal milling machines have like ball screws, 3Nm steppers, 48V low voltage rail, preloaded linear guides. To keep the price tag moderate it misses higher-end features like belt drives, dual linear guides on the Z-axis, and additional stiffeners for portal, z-axis, and main frame.
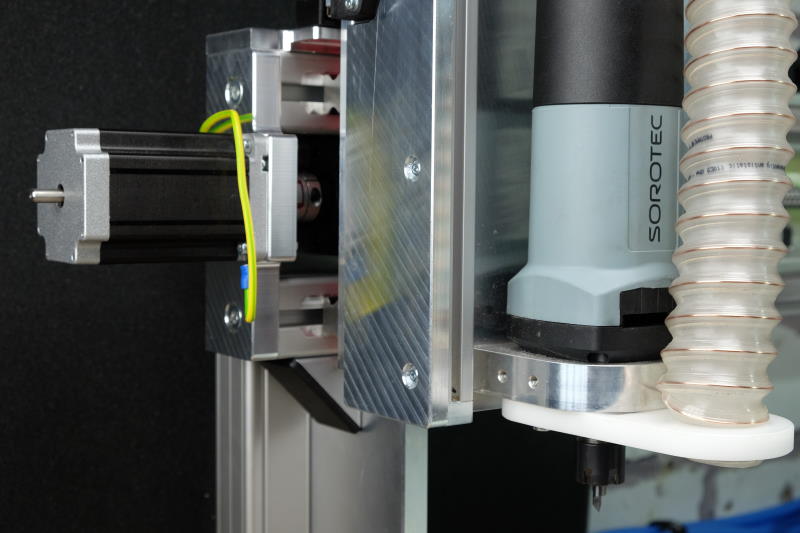
That’s why you have to know which loads are borderline and pull back on those. But that’s likely true also for more advanced machines, they only raise the limits. What blocks quicker feed rates or higher depths of cut within my setting currently is the router motor and the way it is attached to the Z-axis.
The motor is clearly overwhelmed with
- birch multiplex, full-slot milling, 6mm cutter 2-flute,
S24000,Z+12mm,F4000 - HPL, full-slot milling, 6mm cutter 2-flute
S24000,Z+6.5mm,F3500 - Aluminium AlMg1, full-slot milling, 6mm cutter single flute,
S24000,Z+3mm,F1600
If you reduce depth of cut and/or feed rate however, it will be able to run the job very well. Machine accuracy is pretty good; the actually limiting factors here are the manual determination of XY0 visually and the non-calibratable tool length sensor, not the machine itself.
The vacuum table opened up the world of fine engravings with a V-cut. Problem was that before, workpiece warp and inaccuracies of the workbed caused engravings to be of very mixed quality and larger tolerances in width than I had anticipated. These issues are now gone, as well as the additional work of creating fixtures for small or cumbersome Workpieces. Holding and clamping got easier by a magnitude, and I could reduce Z-safety height which would speed up engravings by as much as 20%.
I focused on reducing machining time as much as possible so I wouldn’t have to spend more time than necessary monitoring the machine in the cold workshop. That’s why I deliberately brought it and the cutters to their limits in terms of rapid movement speed, feed rate, and depth of cut. When I figured out these limits, I dialed back on the parameters by 20-30% to stay safe and keep repeatability high.
Upgrades#
I upgraded my CNC with a vacuum table and had to learn a lot about clamping forces and vacuum pump selection. I installed acoustics insulation to get noise level and low-frequency vibrations down. It’s hard to see in the below image, but the whole machine table’s underside has been covered in sound- and vibration absorber mats.
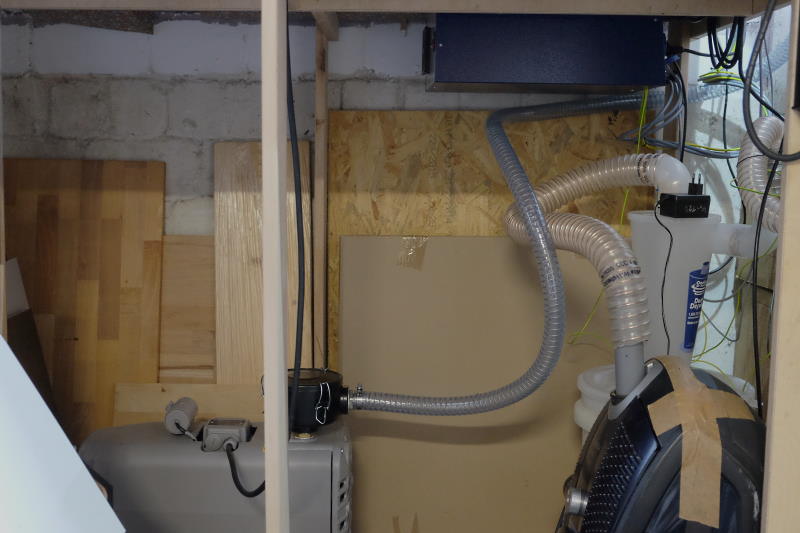
Also, a chip extraction system was added so I wouldn’t have all the dust in my workshop. It works flawlessly. The amount of chips produced is astonishing and I’m glad to have it installed since the early days.
I will soon add a dedicated 3-phase spindle motor to further minimize vibrations and tolerances induced into the motor mount. The machine will become a little more quiet, yet more powerful so that I may finally be able to reach the target feed rates mentioned above.
Materials#
I have been working with hard wood, multiplex, MDF, acrylic (PMMA), Polystyrol, High pressure laminates, and Aluminium composites.
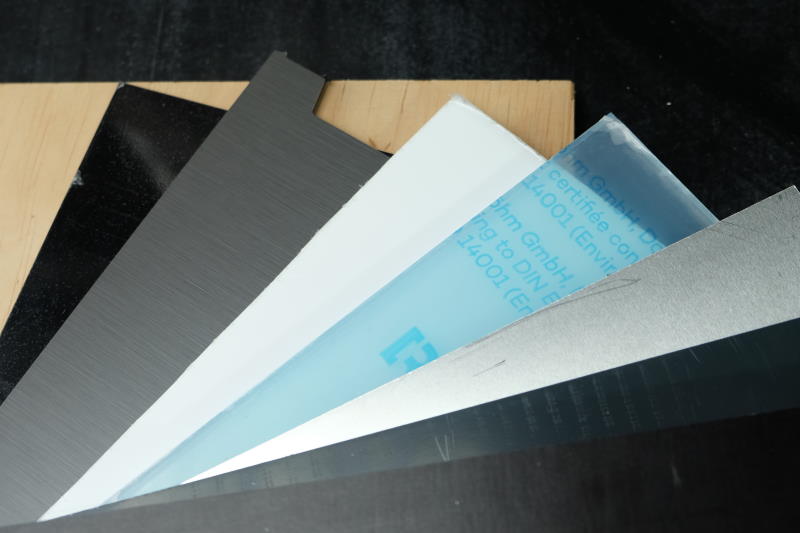
With all of these, I had to learn how the materials behave and with which parameters to run the endmills for high quality results. Some materials were so challenging that my machine was overloaded, with some others I had vibration issues or problems to raise the bar on quality but I always learned from these failures and improved my processes so they could be circumvented.
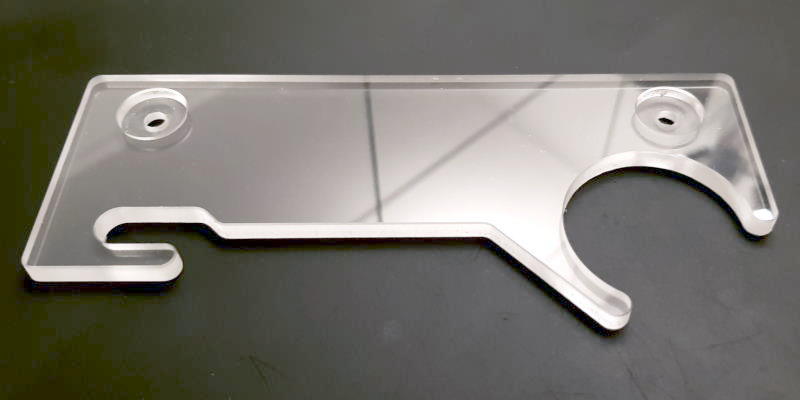
The image above shows an extraction hose clamp that I mounted to the Z-axis of my CNC, made of PMMA (Acrylic). I worked hard to get minimal chamfers just right and to utilize smoothing runs where I thought they could provide better surface finishes.
Software#
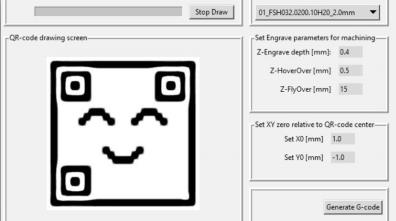
When my engraving projects got more and more complex, my CAM kept crashing when calculating paths for batch processing. Thus I had to do batches manually which made me dive into coordinate shift commands like G54...G59.3, G68, and G92 which will kill your workpieces if not properly understood.
This helped me better understand the numerical controller and its interpreter language.
Last but not least the learning curve I had to get used to working with FreeCAD and Estlcam had to be pretty steep, or else I wouldn’t have been able to get my parts cut.
Help & support#
Luckily, I always had people who were both willing and able to help. My wife was always there to support and allowed me to make time for this, and my kids were visiting me in the workshop frequently so that I didn’t feel lonely at any time. It is my wife and some great friends to whom I could talk to when work got frustrating. But I also had outstanding support from the commercial side:


Runtime and jobs#
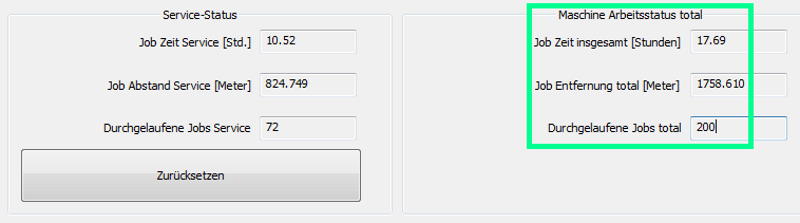
Within the year, I ran 200 jobs with a total machine time of less than 18 hours. When counting in workpiece setup, machine calibration and so on, I’d triple that number. And that result again can be doubled easily when taking time for CAM/CAD into account, too.
In terms of time, I can’t tell exactly how many hours I devoted to the machine itself. I believe it is on par with maintaining this website, where the creation of 1 minute of “time to read” is about one hour that I need to invest.
I also spent hours and hours online researching for material parmeters, cutters, taking and giving advice in forums, investigating machine upgrades, and watching videos about how other people use their CNCs.
By the way, my current favorite (as of March-2023) is by CNC Connect (youtube link). I won’t try to compare myself to that but I’m always impressed by people and manufacturers who know their stuff.
Cost#
The CNC hobby is expensive, both in terms of money and time. In my case, I invested nearly 13.000,00€ 😨 into machine, its accessories, spindle, machine table, power supply and protective equipment, lighting, numerical controller, laptop, CAD/CAM/CNC software, acoustic insulation, tools to build the machine, exhaust extraction system, personal safety equipment etc.
And with that, I didn’t even mention cost for endmills.
This is how it is: “The machine itself is not too expensive”, you think. But once you decide to buy, you enter a rabbit hole. I followed it down almost all its paths, making very few compromises on quality of equipment, and not specialising in one material which would have kept costs down.
I was intrigued by the different materials and their properties, and it was always a joy when a part turned out really good, independent off the matter it consisted of.
Failures & solutions#
Here’s a list of bigger issues I experienced within the last year.
Router motor stop, intermittent operation. Ⓜ️#
This issue was reproducible in hard wood and multiplex after just 8h of spindle operation. Solution was the installation of a new electronics PCB that Maffell supplied without further ado.
Mid-job router motor speed drop to minimum RPM Ⓜ️#
This issue was reproducible as well and had two key causes:
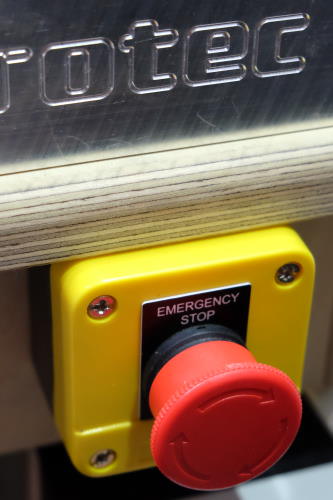
- Emergency switch had very little travel for triggering, so there were short contact bounces possible. The switch is mounted to the machine table, and could be triggered through machine vibrations. I fixed this by modifying the microswitch’s position in the housing so that the switch wouldn’t trigger early.
- The breakout PCB that generates the analogue
0-10Vsignal out of the CNC’s pulse width command had a wrong operational amplifier type mounted (non-RTR). Under yet unknown circumstances (maybe contact bounce of emergency switch?), this part would experience latch-down so the router motor speed would drop to its lowest possible setting. A new signal breakout board was mounted and the issue disappeared.
CNC: “Velocity was higher than max!” ⚠️#
This error appeared on a few occasions. They were all unpleasant. Once, I pushed my machine too hard (240mm/s on XY, 110mm/s on Z), which made it squeak and loose a lot of steps, adding up into the centimeter range.
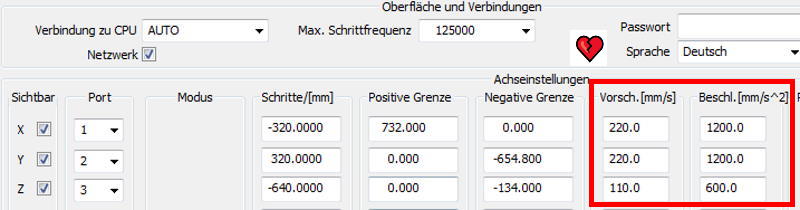
Another time with less high (but still too high, retrospectively) velocity values entered, I made a mistake by commanding a rapid move G00 Xxx Yyy Zzz for all axes simultaneously which made the machine jump and crash into its mechanical limits on Z-axis. Thankfully, it was the upper limit so neither the spindle nor the machine or its bed suffered any damage. Only the stepper clutch slipped. Whew.
The reason: Maximum combined axes move pulse frequency is 125kHz. I considered it was per-axis. This is wrong. I double-checked it with the numerical controller manufacturer. I needed to readjust the axis’s speed values to stay below 125kHz combined.
To find new values, I looked at my jobs so far. I was loosing more time on Z-axis rapid movements than on the other two axes. That’s why I put emphasis on the Z-axis to keep it quick and with high acceleration while I reduced the values for X- and Y-axis. Note that Z-axis has double resolution due to its shorter ball screw threading, so you have to double its values to compare them with the other axes.
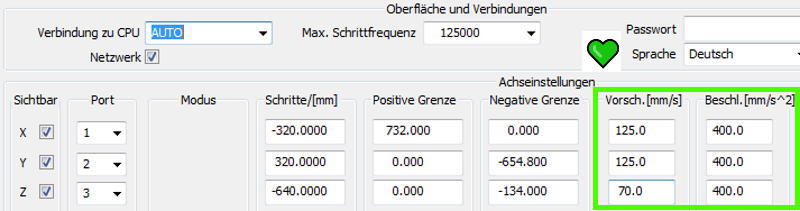
This all happened after improving manufacturing quality that I documented here, so you can consider these values are proven to yield good results, thus won’t be changed again lightly.
Running the machine into the vacuum table 💥#
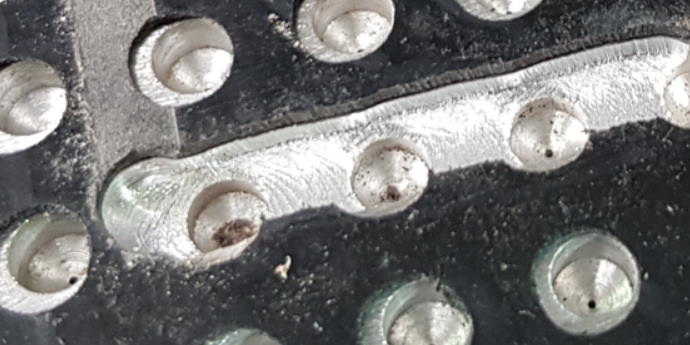
Well, that really upset me. I didn’t even have the table for two weeks, and already now I had damaged it. Worst thing was that I didn’t understand why.
All I wanted was to cut 18mm birch multiplex. I had the rougher do the outline but faced an issue that made me press the emergency switch when the cut already was complete (Travelling back to XY0, the cutter would have hit an obstacle). I fixed the path and reset the machine. I changed tools to do the smoothing, and hit “run”.
When I realized that the machine sounded unusual, I hit the emergency stop. But at over 4000mm/min for smoothing I wasn’t quick enough to avoid the machine run through the vacuum table.
I looked at the G92 work offset for Z-axis. It was correct. I searched in the CNC’s volatile variables. All matched my expectations. Then I started digging into the machine’s logfiles. Luckily, I made the above picture right after this happened so it wasn’t hard to figure out the correct log lines.
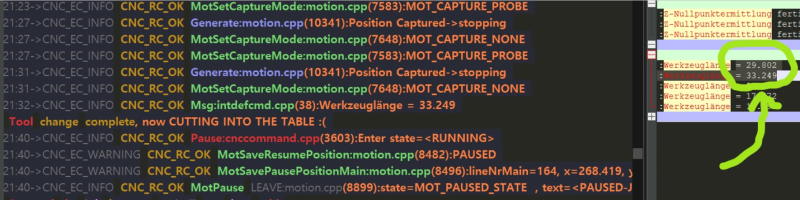
You can see here that tool length has been measured both for the rougher and the standard cutter. The standard cutter protrudes more - by roughly 3.4mmdifference. This is the exact depth that I was missing on my vacuum table now.
Still, I didn’t have a clue what caused the machine to not take the updated tool length into account. So I looked at the Tool Change macro.
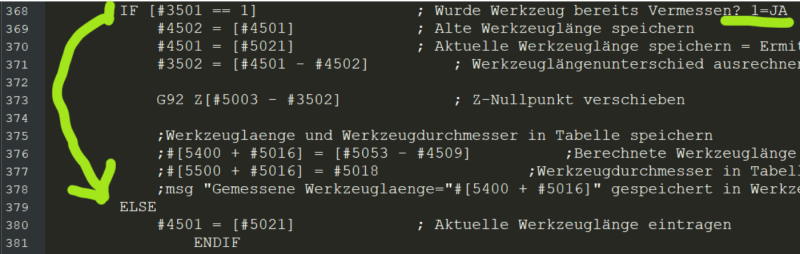
Here you can see that variable #3501 captures whether a tool length has been taken already. This is vital because if so, you can just measure the new tool length and take the difference between the two, save that as a Z-axis offset and you’re fine to proceed the program with the new tool.
The thing is that variable #3501 is volatile as revealed during a good read of the controller’s manual. And it seems like volatile variables are not only reset when the application is closed, but also when the emergency switch is pressed.
Deducing from my prior statements, I had the following issue: The emergency switch press would wipe that variable’s value but keep the original Z0 height measurement that I did at the very beginning before using the rougher bit. So, instead of updating the height offset with the new tool to account for the new tool length, the macro was thinking that this was the first tool used and just saved its length to variable #4501 (because you can’t take any difference if you didn’t have a tool prior to the first one, consequencially).
This alone wouldn’t even have caused this incident if the newly entered cutter hadn’t protruded more from the spindle collet than the one before.
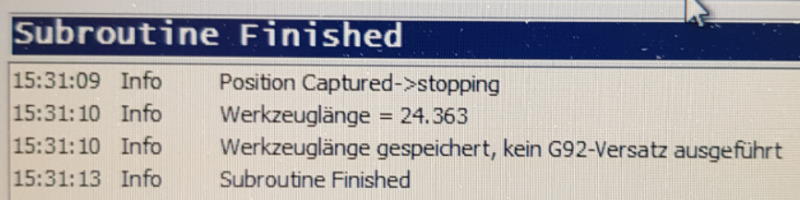
I solved this problem by adding a message into the macro when it was solely saving the tool length but not modifying the Z-axis’s offset. This way I’d at least have an indication when something is about to go wrong.
Conclusion#
In summary, I will continue using the CNC. I will be learning as I go. And I will deepen my knowledge about how software interacts with mechatronics that changes physical matter like ‘Zerspanobert’ does. I’ll try to write down what I learned so others can follow my tracks if they like to.
I hope to be able to maintain good contact to other hobbyists and makers, and to the companies that I had the pleasure to work with so far (and, maybe, to add some more to my list).
Cheers! Schallbert