Broken NVME hard disk?
The event
Mid-April 2024:
After a system update, my laptop suddenly wouldn’t boot. The bootloader grub-core reports that it is having problems writing sectors.
error: ../grub-core/efi/efidisk.c:638: failure writing sector 0xXXXXXXXX
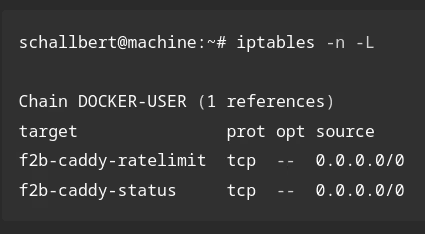
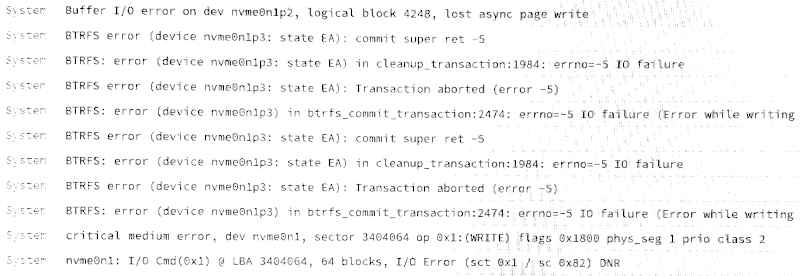
When I reboot, the screen remains black after the company logo is displayed with a blinking cursor. If I look behind the mask, loading various services fails:
Boot errors due to read-only nvme
Initial analysis
I suspected a problem with the computer update and carried out a hard drive test from Lenovo’s UEFI. Result:
The media check is complete, the result is: FAIL
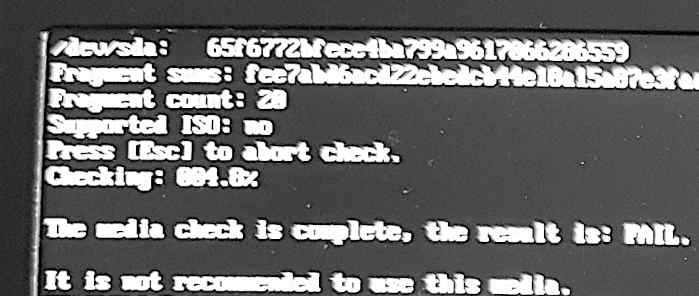
It’s not a problem with the operating system, but rather with the disk. Damn. Do I have to worry about my data? I do have backups lying around, but the last one is three weeks old, so I might be missing several hours of work. A setup from blank will take me a lot of time. So I’m going to try to see if anything can be salvaged.
Self-test
So I run the SMART tests for the disk with smartctl -x /dev/nvm0 and now know that it counts about 7600 hours of operation and has 240GB of usable capacity. The disk used under the name nvme0n1 thinks it is now “read-only”. All partitions including the kernel. Great. The result of my online search was something like:
The disk is irreparably damaged. A new one is needed.
Repair attempt
You don’t have to believe everything you read online. So I use Lenovo’s own repair tool for hard drives. It runs from the UEFI screen and is called Bad Block Recovery Tool. The program scans the disk for defective sectors and attempts to restore affected blocks. The run takes almost half an hour for the last 10%.
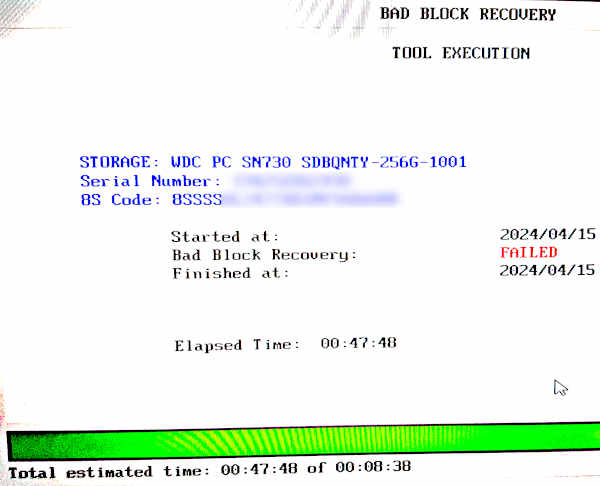
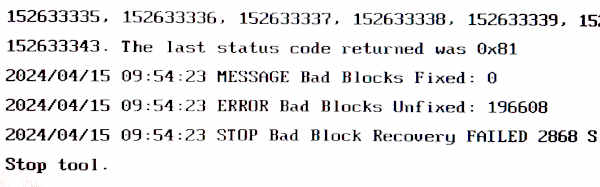
Result: Recovery failed. I run the tool again. And a third time in slow pedantic mode. Again and again to no avail. I keep getting critical medium error.
Is all of this not working because the disk has switched to read-only mode?
As I can no longer boot and have no console available, my options with on-board resources are now exhausted.
Comment: The read-only mode for SSDs
According to the Internet (DiskTuna), the read only mode is there to limit damage. If the controller of the storage device detects a serious error, it puts the disk into read-only access. This minimizes the risk of further blocks being corrupted or killed.
In the forum Superuser someone describes an error identical to mine, and there is actually nothing that can be done to keep the medium working.
Data recovery using a boot stick
I continue with a USB stick that I convert to a Linux boot stick at another computer. I plug it into my laptop and can finally boot it up again. I connect an external hard drive as data recovery medium.
Get an overview with fdisk
First I check whether all disks and partitions appear. To do this I type the command sudo fdisk -l into the console.
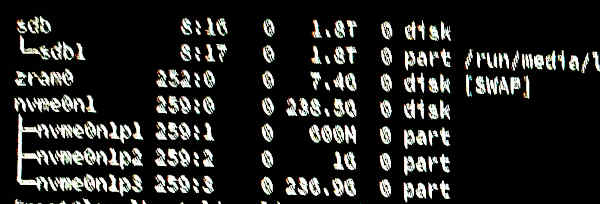
Luckily, everything is still there! Maybe I can just copy the files from the defective hard drive?
Copying with cp
Let’s try it out.
sudo cp -r -v /mnt/nvme0n1p3/Documents/my/important/files /mnt/externalHdd/save
For a few seconds I think everything is going well. But then cp stops with an error message saying the volume is not available. In fact, the disk is no longer mounted. However, I can find it again and mount it straight away. A few attempts later, I have backed up my really important data, but the copying process always stops after a few seconds. This would take far too long for the entire disk.
The observed behavior - mount, copy for a few seconds, disk disappearing - was confirmed to me in a few related forum posts online, so it seems to be normal behavior.
I need another solution.
Save data with ddrescue
 After a quick online search, I installed the program ddrescue.
The documentation states some things very clearly. For example, that you should understand exactly what it does before you use it. Or the following:
“Never try to repair a file system on a drive with I/O errors; you will probably lose even more data. “ - ddrescue Manual
Now I’m wondering whether I made the same mistake with the block repair attempt above. Or am I on the safe side with Bad Block Recovery, since this is about data blocks on the disk and not the “overlying” file system?
It also says here that the so-called mapfile is a core function of the program. It offers a great time advantage when aborting, restarting, merging backups and during data recovery. Therefore, it is not a bad idea to create the mapfile when creating an offline backup and to put it away safely. Overall, I found the tool extremely helpful, effective and easy to use and can only recommend it at this point.
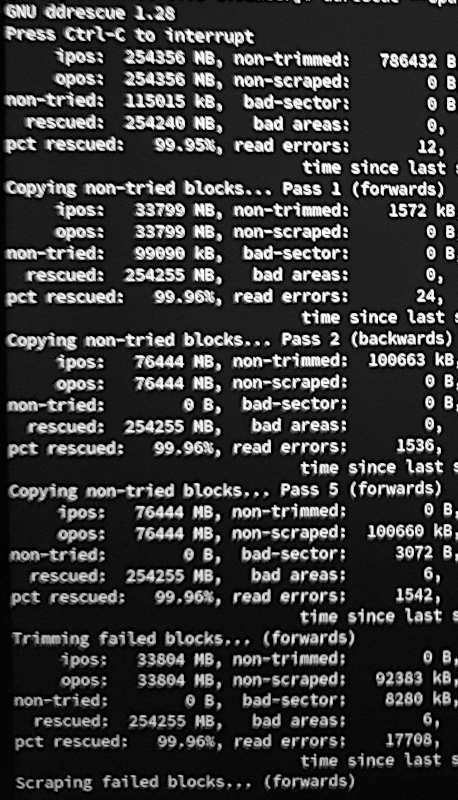
Back to action: I find a very simple command to copy the entire data partition of my damaged NVME storage to an external hard drive:
ddrescue --sparse /dev/nvme0n1p3 /run/media/liveuser/myExternalHDD/datapartition
The --sparse option skips areas of the source disk that are filled with zeros and can thus save a lot of space on the target disk.
The program takes a quarter of an hour to complete the entire run. As you can see in the picture above, it can actually save 99.6% of the data and even several months later I haven’t missed the remaining 0.4%. Lucky me.
Verification: View the output of ddrescue
In any case, the program ultimately saves a single file on my external disk: datapartition.img
I can view this image with fdisk -l:
datapartition.img: 236.89 GiB, 254356226048 bytes, 496789504 sectors
Units: sectors of 1 * 512 = 512 bytes
Sector size (logical/physical): 512 bytes / 512 bytes
I/O size (minimum/optimal): 512 bytes / 512 bytes
Everything is there, that’s good. Is all data included as well?
To check this, I mount the partition and look around using cd and ls -l:
sudo mkdir /mnt/olddisk # Mount point of the rescued data image
sudo mount /run/media/liveuser/myExternalHDD/datapartition.img /mnt/olddisk
Fortunately, everything that should be there was there. Now I could unmount the image, shut down the computer and have a new hard drive installed.
The new hard drive
Here, too, I was lucky: my used laptop was still under warranty and so I got it returned within a week with a new (and twice as big) hard drive. Because I was so afraid of data theft, I removed my old hard drive before sending it. I felt pretty paranoid.
I could have saved myself this work, maybe, because ddrescue has a software solution for paranoid people like me: the --fill-mode option.
This allows you to delete the “still good” blocks and sectors after the rescue has been completed. Only the sectors that are already defective remain. From the online documentation:
ddrescue --fill-mode=+ --force /dev/zero bad_drive mapfile
I’m not sure whether this would have worked with a disk like mine, which the on-board controller had set to “read-only”. Whatever.
At least I can now continue writing blog entries with a fully functional laptop ☺️.