Hardware Security Key: add SSH
Motivation
In my post about hardware security keys, I wrote that I want to secure as many of my connections as possible without passwords provided by my new HSK. I use SSH connections for various services and purposes: I access my VPS, use services such as GitHub, Gitea and my own Gitea instance and run backups on the local network via scp, which uses the SSH protocol.
Setting up SSH access for hardware security keys
HSKs such as my Yubikey can store private keys for SecureShell access. This means you no longer need to store them locally on every device (although this remains configurable; see below). Furthermore, they are better protected against unauthorised access than if stored on a computer.
So I’m trying to switch my GitHub SSH access to HSK and am following Yubico’s guide to passwordless authentication for GitHub. The procedure for generating FIDO-compliant SSH keys is the same across different key manufacturers. I’m also linking to the Nitrokey guide for reference.
What doesn’t work
However, even with Yubico’s own recommendations, I am unable to achieve the desired result on my operating system and with the standard installation of openssh. The command assembled from the guide is:
schallbert@machine:~# ssh-keygen -t ed25519-sk -O resident -O verify-required -O application=ssh:github -O user=schallbert -C 'schallbert@github.com'
Once generated, we must store the public key (file extension .pub) in the web application of the respective service under the SSH Access menu item.
Meaning of the command and the most important options
This command1 tells ssh-keygen to generate a key of type -t ed25519-sk for me. The suffix -sk indicates that the key should be stored on a hardware security key - in my case, the Yubikey.
To understand the -O resident flag, we need to know that the FIDO authenticator key, generated as with -sk, consists of two parts: a key handle part, which remains on the computer’s hard drive, and the private key itself, which exists only on the HSM. Only together can they correctly respond to authentication requests. The flag itself, however, instructs the program to write both parts of the key to the Yubikey. This makes it easier to use multiple devices with the same key: the key handle part can be read from the Yubikey and stored on other end devices. On the other hand, however, simply losing the Yubikey is now enough to grant potential attackers SSH access.
-f filename specifies the names for the key files. This is particularly useful when you need to manage multiple SSH connections or HSMs. I’ve created a naming convention to avoid confusion. It’s based on the syntax used to read keys from an HSM (ssh-keygen -K).
-f <keyType>_<protocol>:<service>_<user>_<device>
As a concrete example, my filename here would be as follows:
-f ed25519-sk_ssh:github_schallbert_yubikey-main
⚠️ Note when using Windows: The colon : is not allowed as a character in filenames. It is replaced by an underscore _, which must also be reflected in the config file (Ctrl+H -> replace : with _)
-C schallbert@github.com adds a comment to the key file itself, such as a contact address. This gives the key a label, which makes it easier to manage when dealing with multiple keys.
-O application=ssh:github is simply for neat listing in the Authenticator and ensures that I cannot confuse one key with another. Otherwise, it would simply say ssh:keygen and I would no longer be able to see which services I have stored keys for. Also helpful to discriminate keys when using the -resident option in congunction with key extraction ssh-keygen -K.
-O user=schallbert has no practical use for me, as SSH is not interested in this flag and, contrary to my expectations, the Yubikey Authenticator does not display the username.
-O no-touch-required prevents the hardware security key from having to be touched every time the key is used. Useful for very frequent use, though it compromises security due to the possibility of automation.
-O verify-required specifies that the HSM’s PIN must be entered before the key can be used. Although intended as an additional security measure, this causes problems for me in my shell. Specifically, the PIN is requested once, but the ssh-agent does not generate a prompt in my console every time. As soon as I try to connect via SSH in another session, I receive an error message: agent refused operation:
schallbert@machine:~# ssh -T git@github.com
sign_and_send_pubkey: signing failed for ED25519-SK "schallbert@github.com" from agent: agent refused operation
root@opnsense: Permission denied (publickey).
What was the problem?
After a long, frustrating troubleshooting session (What am I doing wrong? Does it work with the secondary key? Why does it work the first time but not afterwards? What if I regenerate the keys? What happens on other computers? What does ‘AI’ say about this? - The latter certainly took an hour and left me completely stuck), I try a different command. That works straight away.
What does work, however
schallbert@machine:~# ssh-keygen -t ed25519-sk -O application=ssh:github -C 'schallbert@github.com' -f ed25519-sk_ssh:github_schallbert_yubikey-main
If I omit verify-required, I can log in successfully and the SSH agent runs fine.
What verify-required requires
This post sheds some light on my issue. The terminal session I use to create the SSH key pair temporarily stores the PIN entry enforced by the verify-required flag. That is why the login works initially. If I log in later or in a different window, as I did above to check git pull in one of my repos, for example, the SSH agent does not ask for my PIN.
This is likely because the SSH agent itself cannot display prompts to the requesting programme. A submodule of OpenSSH provides a solution: openssh-askpass . This can be passed to the agent, which then transmits the PIN prompt to the user via askpass.
Installing ssh-askpass
My operating system did not have ssh-askpass installed by default, so I’ll install it here. It uses the package manager DNF (‘Dandified YUM’) instead of apt or other common managers. In my opinion, the naming convention isn’t 100% consistent: whilst I address the ssh programme in the terminal as ssh-agent, I have to type openssh-agent for the installation.
# verify-required needs openssh subpackage through Fedora's package manager
schallbert@machine:~# sudo dnf install openssh-askpass
Installing:
 openssh-askpass
[...]
Complete!
Now I want to tell the agent that it can use ssh-askpass to request the PIN. To do this, I need to know the path to the submodule.
schallbert@machine:~# which openssh-askpass
/usr/bin/which: no openssh-askpass [...]
Strange, I installed it above! Let’s have a look what the package manager has to say.
schallbert@machine:~# dnf repoquery --list openssh-askpass
[...]
/usr/libexec/openssh/ssh-askpass
Ah, openssh hides in libexec. Well, then I can link ssh-agent to ssh-askpass.
schallbert@machine:~# eval "$(ssh-agent -s; SSH_ASKPASS=/usr/libexec/openssh/ssh-askpass)"
Agent pid 16747
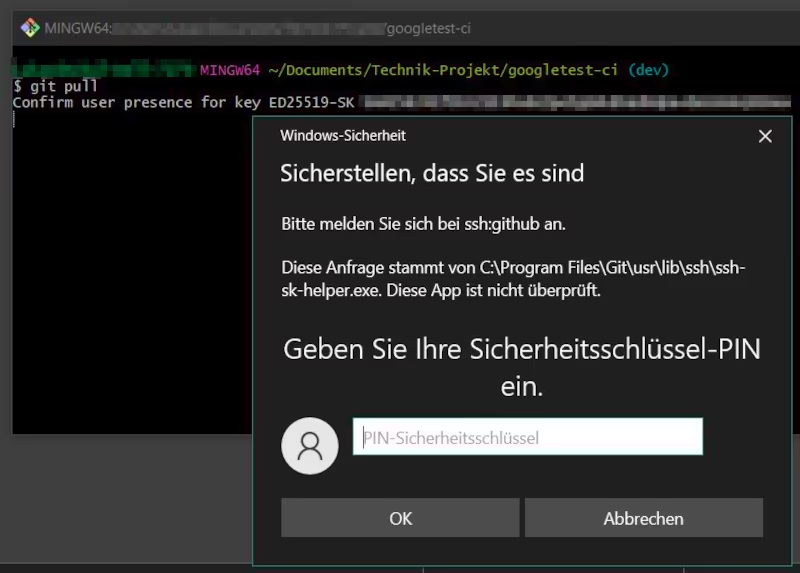
 I check the connection to GitHub and, as expected, a dialogue box appears asking for my PIN. I then need to tap the HSK, after which I receive a success message. To ensure that this all works in a new terminal and after restarting the computer, I add a reference to the key in my configuration file.
# ~/.ssh/config
Host github
  User git
  Hostname github.com
  PreferredAuthentications publickey
  IdentityFile ~/.ssh/ed25519-sk_ssh:github_schallbert_yubikey-main
To be on the safe side, restart the agent and create new terminal sessions. If any login details were cached, this will reset them. When done, validate SSH connectivity.
schallbert@machine:~# eval "$(ssh-agent -k)" && eval "$(ssh-agent -s)"
Annoying: Gnome pop-up ‘Allow inhibiting shortcuts’
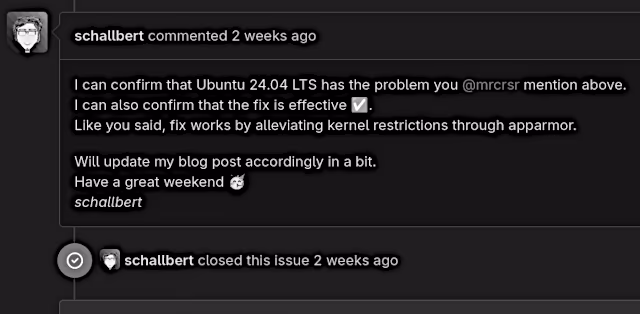
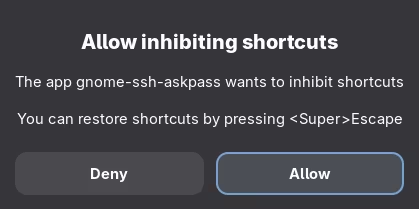 The only downside is that I now get an extra pop-up when connecting via SSH. This is triggered by the gnome graphical user interface. Unfortunately, I can’t find an option to save the relevant setting permanently. As a result, it appears every time I connect with
 verify-required. With Gnome, the problem is already known to affect other applications, but apparently has not yet been resolved.
Transferring to Windows systems
I generated my keys using the -O resident option. It makes sense to test the extraction of the key-handle on a completely different system: Windows.
I open the command line and type
schallbert@windows-machine:~# ssh-keygen -K
Enter PIN for authenticator:
You may need to touch your authenticator to authorize key download.
Provider "internal" returned failure -1
Unable to load resident keys: invalid format
Invalid format? It’s often mentioned online that the keys sometimes need a line feed character at the end to be recognized correctly. However, I cannot modify them without downloading them from HSK. So I manually transfer the public key and key handle to the computer and try out the git pull command as a test. And look: it works!
So if you want to use the keys with different operating system families, the -resident option doesn’t seem to be of any use.
VPS: Be careful when replacing keys
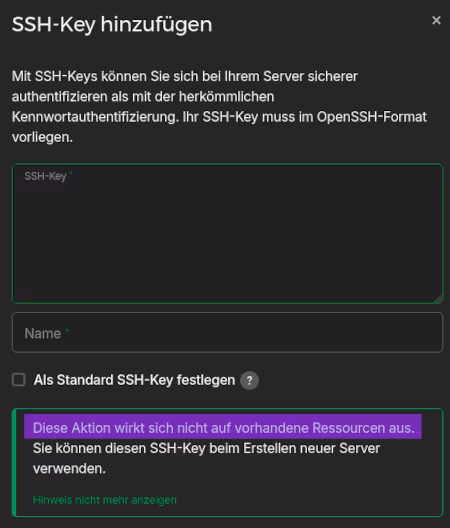 Another tip from personal experience: If you’ve already stored SSH keys with a service provider that hosts live-resources itself (in my case, a server as a VPS), new SSH keys are usually not passed on to that resource via the web frontend.
Consequently, the “old” keys are still needed, and the new ones aren’t used, even though they’re stored in the web app!
The new keys must be manually added to the destination.
I follow the instructions from my host Hetzner using the ssh-copy-id command.
Manually store new keys on the VPS
schallbert@machine:~# ssh-copy-id -i ./ed25519-sk_ssh:server_schallbert_yubikey-main.pub server
Here, server is the SSH alias for my VPS. The connection is established using the familiar “old” key, and the “new” one is saved. But something isn’t working as expected:
/usr/bin/ssh-copy-id: INFO: attempting to log in with the new key(s), to filter out any that are already installed
/usr/bin/ssh-copy-id: WARNING: All keys were skipped because they already exist on the remote system.
		(if you think this is a mistake, you may want to use -f option)
Was the key transferred successfully?
So I log back into my server and check whether the new key actually appears in the ~/.ssh/authorized_keys file. It doesn’t. So I run the command above again, this time with the -f (Force) option enabled. And sure enough, the transfer works!
schallbert@machine:~# ssh-copy-id -f -i ./ed25519-sk_ssh:server_schallbert_yubikey-main.pub server
Number of key(s) added: 1

Now try logging into the machine, with: “ssh -i <identityFile> 'server'”
and check to make sure that only the key(s) you wanted were added.
To test it as recommended, log in with the new key and… It works! Only now can the old keys be safely deleted.
Thoughts on convenience and usability
When I look at my SSH connections, they broadly fall into two categories:
- Admin access (VPS, NAS, Raspberry Pi) and signatures
- Protocol access (Git etc.)
In my view, the former require a higher level of security. Furthermore, I don’t use them as frequently as version control systems. I therefore recommend verify-required for the first category and would omit this for the second. I would take the same approach with the no-touch-required option: if a commit is to be uploaded every few minutes, constantly having to touch the key is rather annoying.
-
All options are displayed when you open the manual using
man ssh-keygen. ↩