AnywhereAmps - Alpha
Mobile Instrument Amplifier/Cabinet combo prototype based on Shelly13. AnywhereAmps Alpha has a low power, small footprint aproach. It is designed as a very portable full frequency range practice amplifier with a total weight of only 3.1kg. It features adjustable gain and a 9V DC supply for external effects pedals.
Project stats
- Difficulty: medium 3/5
- Cost: ~170€
- Time: 10h
Impressions


Amp sound samples
Bass samples
Predominantly high notes
Played really hard
Open strings & flageolet notes
All tracks recorded with Zoom’s H4n using an Ibanez SR1500PD from 1992 with the neck pickups @100%, full volume, low string setting.
Dimensions
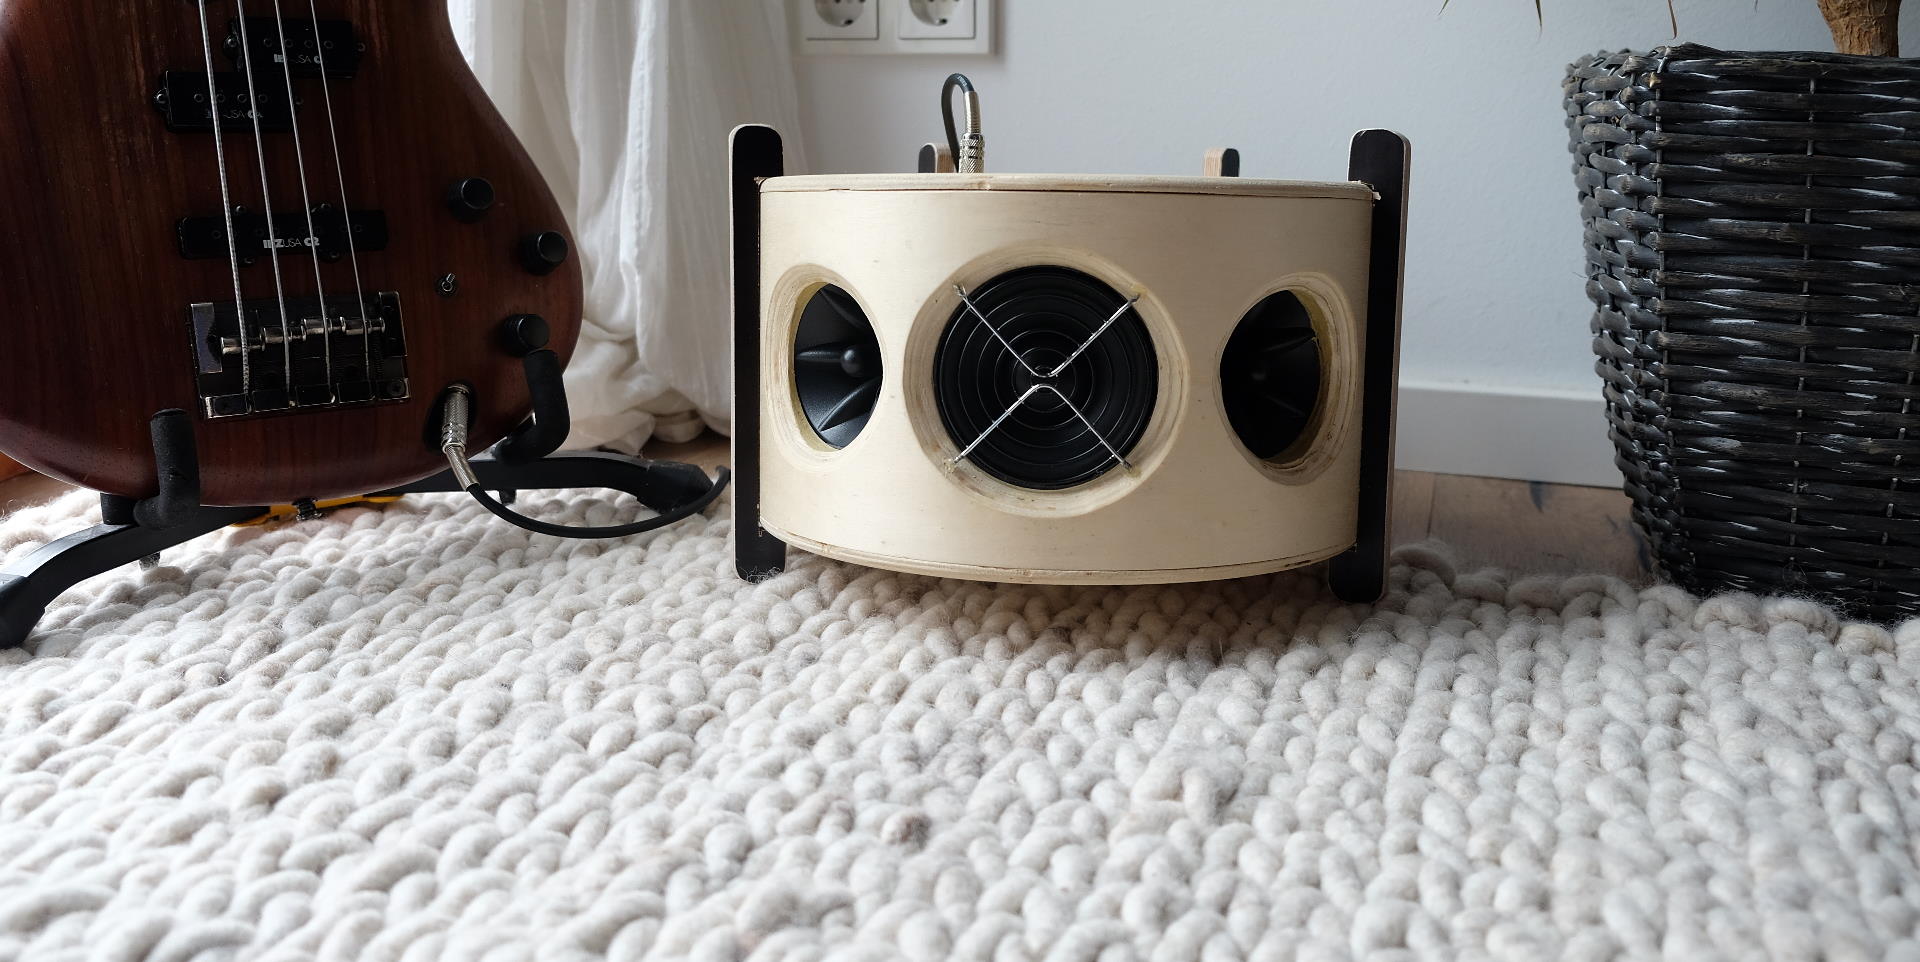
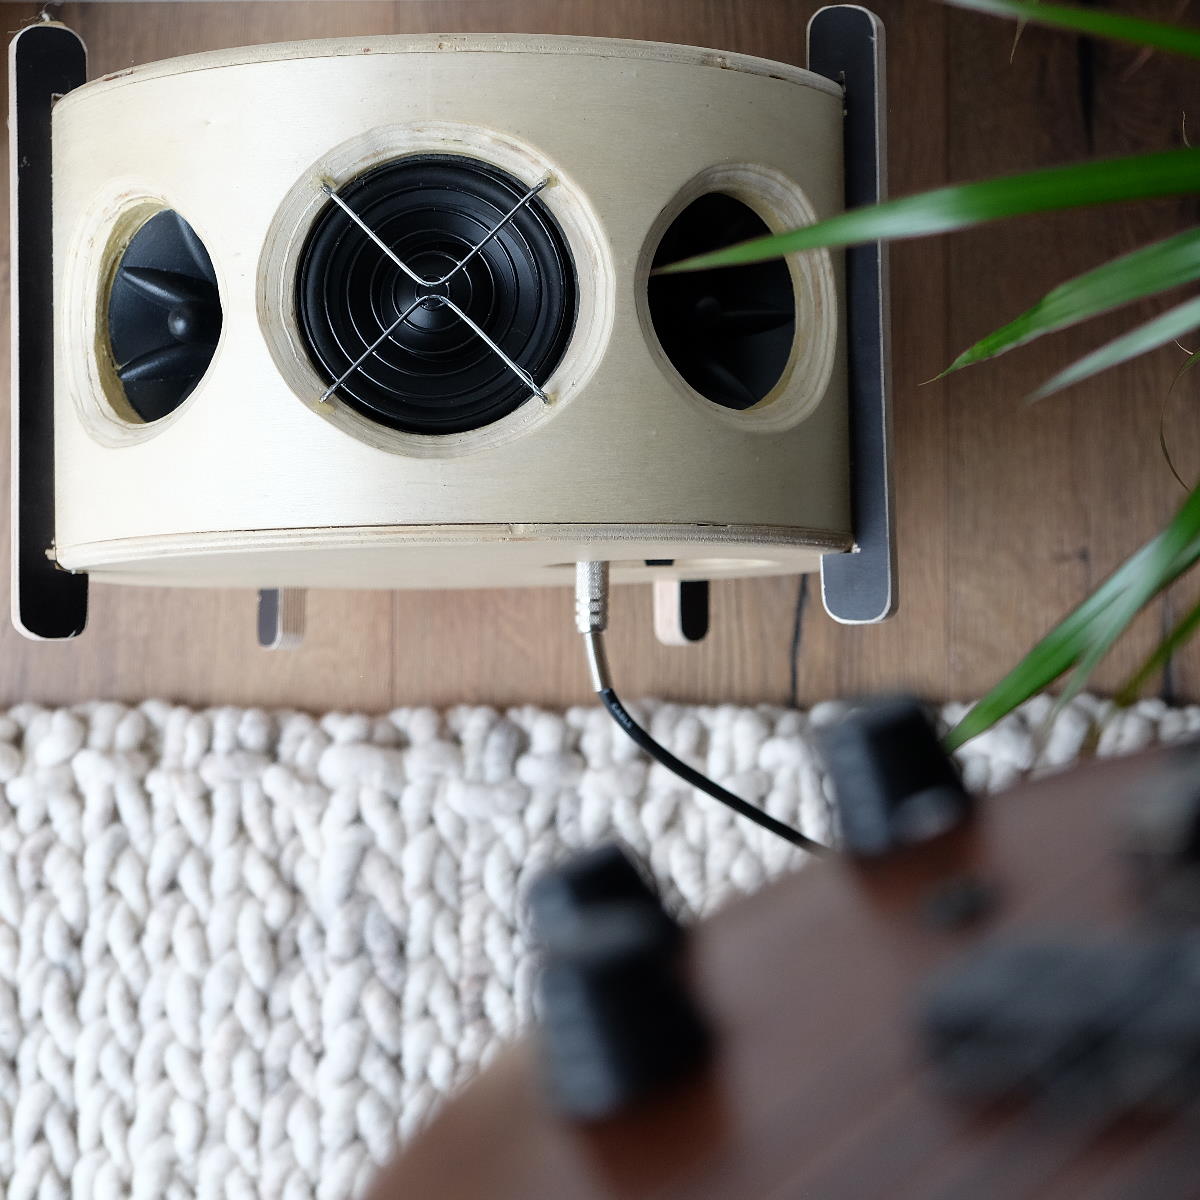
Raw drum shell: 12"x6". Total height is around 17cm, width 30cm, depth (without battery) at 32cm. The enclosed volume incl. amp and speakers is ~9l. I’m using a non-vented cabinet design.
Sound Hardware
- Speakers: 4” Bass/Mid and two Piezo tweeters
- Class D amplifier with
30WRMS power (bridged) 14.4VLi-Ion tool battery supply- All sensitive parts on the inside of the cabinet
- Custom built preamp with
0...27dBadjustable gain
Simulation
The simulation shows that the volume of ~9l damped cabinet would be a perfect match for the selected 4” speaker. It will go down as low as 44Hz (F#1, one full note above e.g. a Bass’s lowest open string E1). There will be punchy lows at a precision which is still good. The downside is the low efficiency of just 78dB/W/m, so the expected maximum volume I’ll get from the power input will be rather low and the speaker will be driven into its excursion limits early.

Custom Preamp
The class-D amplifier I selected requires a line-level input, so I had to add a preamp to my design to get sufficient volume from the power stage. Even the cheapest Preamps like this one from Art Pro Audio would add considerable cost to the design. They would weigh a lot and consume quite some power, especially if they are tube preamps, and often have special requirements on input voltage (like AC only). Plus, their design wouldn’t blend into mine.
So I decided to design a low power, minimal parts gain stage myself. Click here to skip the nerdy Tech details
Voltage rails
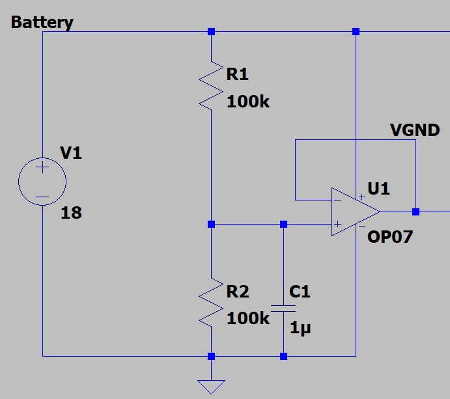 As the preamp would amplify alternating voltage signals but I only have one battery voltage rail available, first I had to think about creating a virtual ground potential that would be the point of signal zero for the gain stage. Luckily, there are a lot of design guidelines about how to operate the amplifier with a single voltage source, so I had something to start with. I used
 10kOhm resistors to clamp the inputs of the gain stage to the virtual ground.
Gain stage
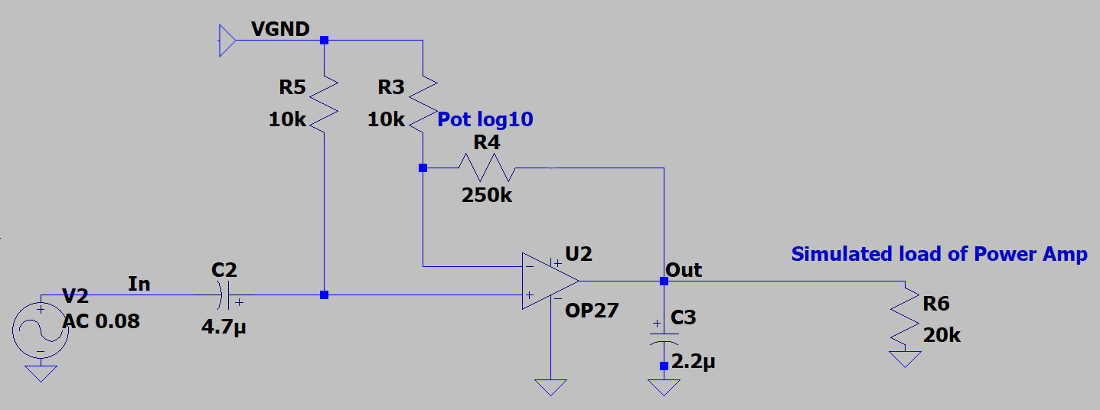
AnywhereAmps Alpha should be a multi-purpose instrument combo, so that there should be a wide gain range available to bring everything from a passive guitar to a line level Keyboard to the same voltage levels for the power stage to deal with. That’s why I decided to go for a 0-27dB amplification range and selected resistors for the feedback loop to be 10kOhm and a 250kOhm logarithmic potentiometer.
Circuit simulation
I used Analog Device’s LTspice to simulate how this circuit might behave when given a typical Audio signal between 20Hz and 20kHz. From my studies I remembered that I might be most interested in a so-called Bode plot which would list both amplitude and phase over frequency in a double-logarithmic scale. Conveniently, LTspice offers such a function.
As you can see, the preamp’s output - green - stays flat into the 10kHz range and the phase would only shift a little while the input line -blue - stays ~27dB below.

Op-Amp selection
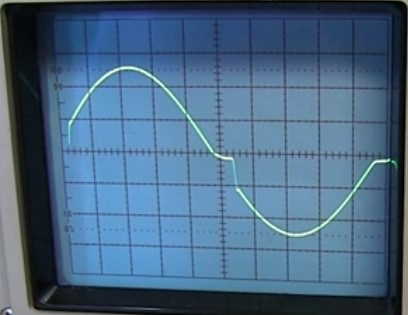 Well. I tried this design on my breadboard with multi-purpose Rail-to-Rail Operational amplifier I had lying around and it worked… not well at all. When I connected a function generator at the input and measured what was supposed to be a sine wave at the output of the LM324, I didn’t get a sine wave at the output at all, but a half-sine with some steps and discharge-alike curves around
 0, then followed by the negative half-sine… After some search I found out this is called “Crossover distortion” and is caused by the asymmetric output stage of this specific op amp type. I was able to correct this a bit when applying a higher load current on the output, but finally I wanted to choose an op amp which was better suited for my audio application without rail-to-rail capability and lower noise ratios. Thankfully, there are quite some pages on that topic like Cicfy Research’s Op-Amp shootout. Weighing in a reasonable piece price and the availability at my electronics distributor, I selected the NE5532P. The video below shows what I got from the updated op-amp selection.
Preamping a Sine wave
Circuit design
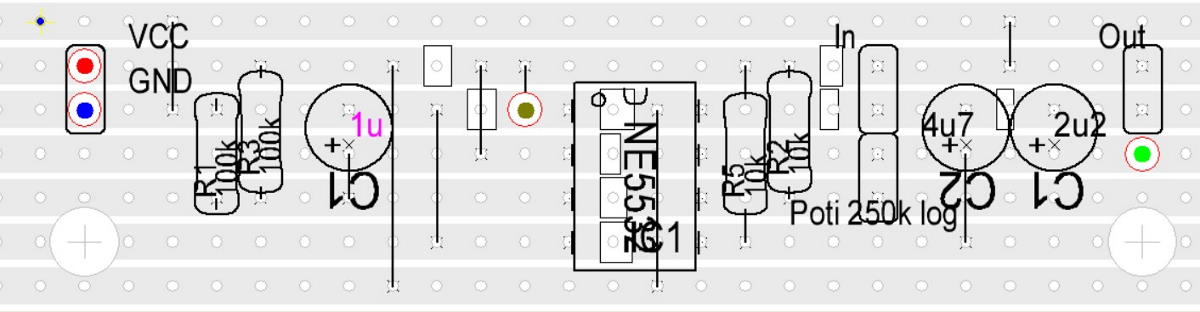 I wanted my circuit board to use as little space as possible while keeping DC voltage supply panes like a frame on the outsides of the board. The board’s left half is dedicated to creating the virtual ground potential while the right half does the amplification part. The design is minimal, using only as much as four resistors and three capacitors.
For a technical deep dive, refer to my design considerations.
Sound quality
AnywhereAmps Alpha is absolutely quiet in idle, even with gain full up there’s only so much as a little hissing from the tweeters. No hum, no scratching when turning the gain knob. It works with any instrument due to the wide gain range using 0dB for line levels like Keyboards, preamped instruments, mobile phone, and up to +27dB for passive Bass or Guitar direct in. Maximum volume is fine although the low-lows “flatten down” too early, limiting usable volume range e.g. for organs and 5-string basses. For frequencies in the Bass range at high volume, it still comes down to Physics - the bigger the better. Find some sound samples up here.
Summary
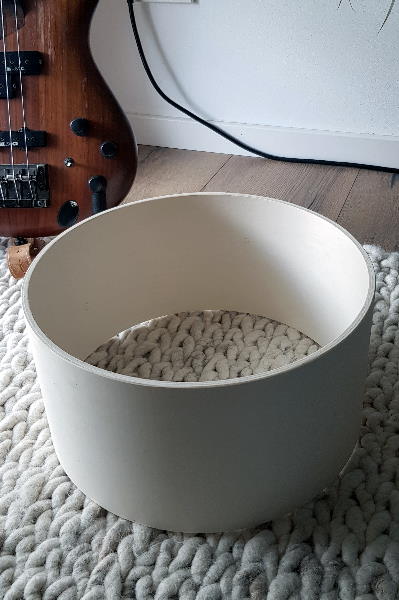
For the cabinet, I ordered some raw custom size Tom-tom shells from Cube Personal Drums. Cutting and especially hand-routing a curved surface proved to be hard, and the fact that I don’t own a proper wood workshop and did all this work on the balcony of my flat didn’t make it easier.
But after roughly 10h incl. soldering and electronics work, I now have more than a super-portable instrument combo.
It’s a piece of furniture.
I’m going to be playing it a lot. Plus, the good sound keeps me more motivated than ever to go the next step and boost reproduction of the low frequency range with another, larger prototype.
Pros:
- I like the design.
- Fits into standard Drum bags!
- Lightweight,
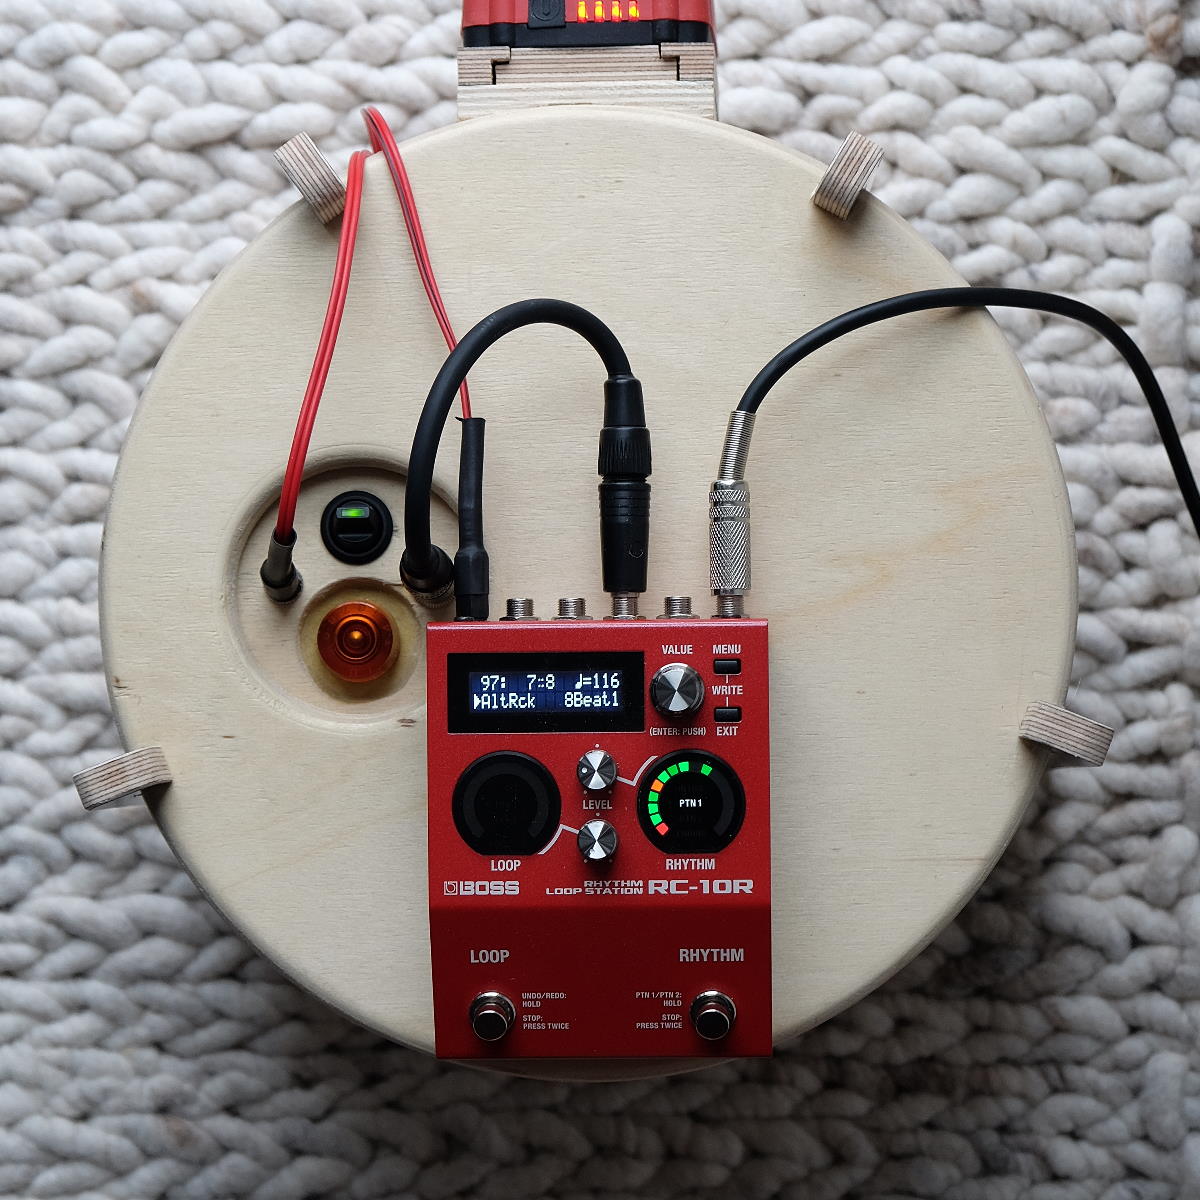
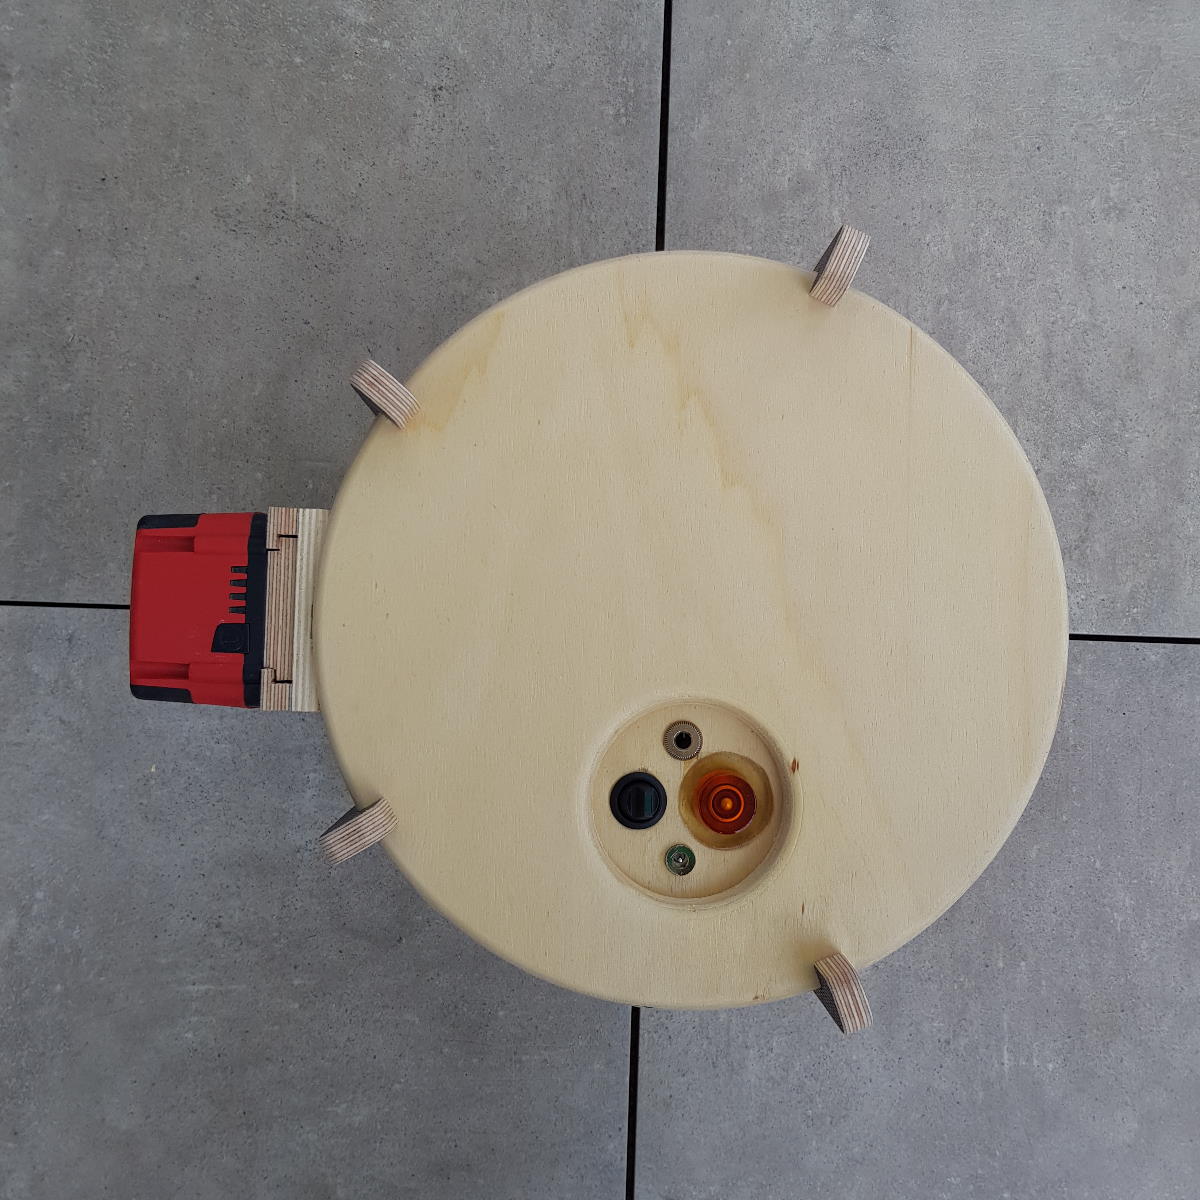
3.1kgincl. Battery,2.6kgwithout - Battery state of charge can be read at a glance
- Retracted controls: Avoids inadvertent operation
- More robust: All electronics and speaker chassis mounted inside
- includes
9V, 1.6Apower supply jack for effects, stomp pedals, etc. - Sounds good for any instrument as it plays almost the full audible frequency spectrum
- Runs
>20hon a battery charge (14.4V, 4Ah) as a practising amplifier and moderate volume - Runs
>3hon a battery charge at maximum volume
Imperfections:
- Too small for sub-bass reproduction.
- No auto mute on switching the amp on or off -> Pop Noise
- Of course, not enough volume to match a drumset or plugged band setup.
- Looks weird with big battery packs on the back. Use of a “flat pack” would be nice
AnywhereAmps Alpha: DIY Replica
You want do build your own copy? Sure, use the step-by-step guide below and get going! AnywhereAmps Alpha DIY instructions
Alpha live!