Convert videos with VLC player
Website: media creation
For this website, I have been converting media files a lot. You know, the photos I shoot are really big which leads to long page load times and screen-filling images. While it is quite easy to reduce their size, and increase JPEG compression, it is a lot harder to do so with videos.
The problem
 WTF, VLC?!
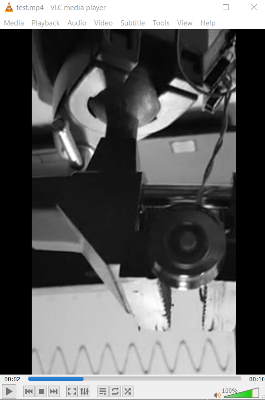
I’m using the popular vlc player and somehow I didn’t seem to get it right. Either my video doesn’t turn out in greyscale as I planned, the output file is empty (Use
WTF, VLC?!
I’m using the popular vlc player and somehow I didn’t seem to get it right. Either my video doesn’t turn out in greyscale as I planned, the output file is empty (Use H.264, instead of H.265 to fix), the aspect ratio seems distorted, or the video suddenly has rotated which I neither wanted nor expected to happen.
Items to cover
This series of steps help me (and maybe you, too) how to make simple video conversions like
- Change or remove colors
- Rotate a video
- Crop video, update aspect ratio and resolution
- Cut / Trim a video
- Change video resolution / size
How does the filter stuff work?

Preview filters
VLC has a quick-preview feature for the most common filters in the Tools -> Effects and filters menu. This directly affects the video you’re viewing, but won’t affect your saved file. It’s just meant for you previewing and controlling the effect properties these filters will have on your video. View this VideoProc blog entry for in-depth guides - and - more importantly - many images stepping you through. For the impatient fraction: continue reading 😉
Save filtered video to file
 To save a filter that you selected for your preview, you must add them to the conversion profile. As long as they remain ticked, any save with this profile will modify your video, eventually even although you unticked all changes you made to the preview filters in the past!
How to change colors in my video?
- Open the video file you want to modify.
- Click
Tools -> Effects and filters(or pressCtrl+E) - A dialog with three tabs opens. Select the
Video Effectstab. - Under
Essentials, tickImage Adjust. - Make your changes and hit
Save, thenClose. A preview of the effect is shown in the main window. - Open the playlist view by pressing
Toggle Playlist(Ctrl+L) - Right-click your video, select
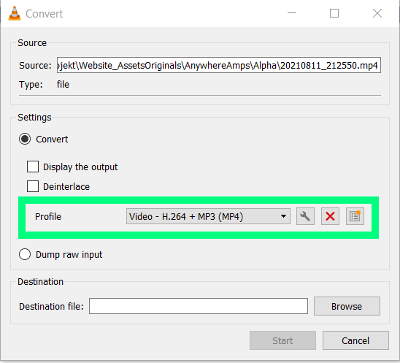
Save...in the context menu. - Press the wrench symbol
Edit selected Profileand in theVideo codectab, select theFilterssub-tab. - Tick the
Image properties filter. This will make your change permanent once you save your file. - Enter a destination file and hit
start. - Don’t forget to untick the
Image properties filterin your profile. Also rewind the changes you made in theVideo Effectstab (step 4).
How to rotate my video?
- Open the video file you want to modify.
- Click
Tools -> Effects and filters(or pressCtrl+E) - A dialog with three tabs opens. Select the
Video Effectstab. - Under
Geometry, tickTransform. - Make your changes and hit
Save, thenClose. A preview of the effect is shown in the main window. - Open the playlist view by pressing
Toggle Playlist(Ctrl+L) - Right-click your video, select
Save...in the context menu. - Press the wrench symbol
Edit selected Profileand in theVideo codectab, select theFilterssub-tab. - Tick the
Video transformation filter. This will make your change permanent once you save your file. - Enter a destination file and hit
start. - Don’t forget to untick the
Image properties filterin your profile. Also rewind the changes you made in theVideo Effectstab.
How to crop my video?
- Open the video file you want to modify.
- Click
Tools -> Effects and filters(or pressCtrl+E) - A dialog with three tabs opens. Select the
Video Effectstab. - Under
Crop, play around with the pixel values and watch the preview window carefully until you’re happy with the crop. Note or memorize the settings you’d like to apply. Close the dialogue. - Click
Tools -> Preferences(or pressCtrl+P) - On the
Interface(start) Tab, select the radioButtonShow Settings - All. - Scroll down to the
Videoelement and openFilters. - Select the
Video cropping filter. - find the
Cropaddelement within the filters list on the left. Enter the values you memorized/ noted down in the preview. HitSave. - Open the playlist view by pressing
Toggle Playlist(Ctrl+L). Then Right-click your video, selectSave...in the context menu. - Press the wrench symbol
Edit selected Profileand in theVideo codectab, select theFilterssub-tab. - Tick the
Video crop filter. This will make your change permanent once you save your file. - Enter a destination file and hit
start. - Don’t forget to untick the
Video crop filterin your profile. Also rewind the changes you made in theFilterspreferences item.
How to trim my video?
Note: A more detailed version of this can be found in this post.
- Open the video file you want to modify.
- Show Record button in VLC Player (tick
View->Advanced Controls) - Jump to where you want the trimmed video to begin.
- Press the red
recordbutton - Play the video sequence. Stop where you want to end your trim.
- VLC’s standard location for video output:
C:\Users\Username\Video
How to change video resolution?
- Open the video file you want to modify.
- Open the playlist view by pressing
Toggle Playlist(Ctrl+L). Then Right-click your video, selectSave...in the context menu. - Press the wrench symbol
Edit selected Profileand in theVideo codectab, select theResolutionsub-tab. - Enter the video size you’d like to convert to and hit
Save.
Hope this helps!