Milling Albizia/Albasia
What is Albasia?
 Albasia wood (Falcataria falcata), also known as Albizia, is a very light softwood. It is found primarily in Southeast Asia and grows rapidly, which improves its sustainability rating. Its color varies between whitish-yellow and pastel brown-pink, but is significantly lighter than beech or oak.
In Europe, it is usually sold as plywood. This mitigates disadvantages such as the strong tendency to shrink and warp.
The density of Albasia is about 15% lower than that of the already very light poplar wood. It forms long fibers as it grows, which impairs its machinability. Because it also provides good insulation due to its numerous air pockets, it is often used in vehicle interiors (campers, boats, etc.). To compensate for its low strength, Albasia multiplex is often offered as a sandwich panel rather than raw.
Sandwich technology achieves good material properties
My test material has a 0.8mm thick layer of high-pressure laminate (HPL) applied on both sides. The surface is available in colored melamine decors and can be ordered with a hardened finish, which makes it matte and scratch-resistant.
Are Albasia composite panels suitable for outdoor use?
“Our panels are not intended for outdoor use.” - EpicPLY, Retailer
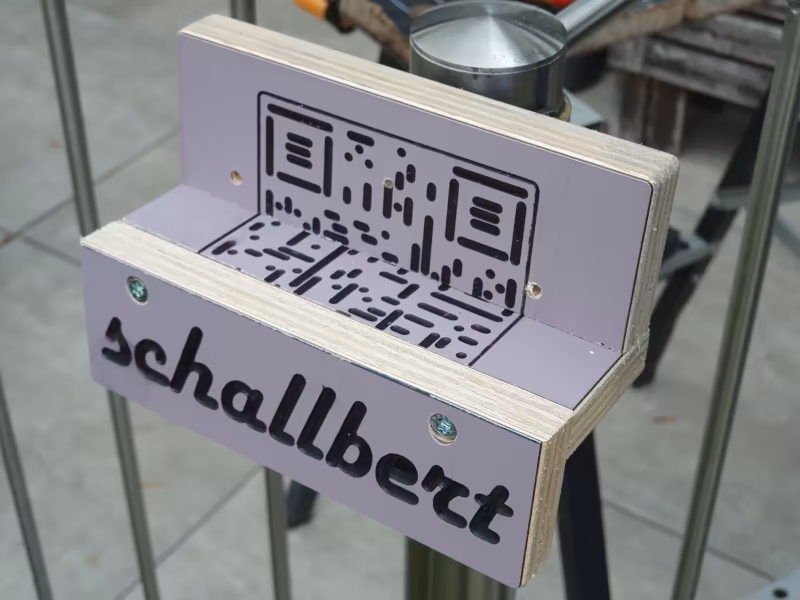
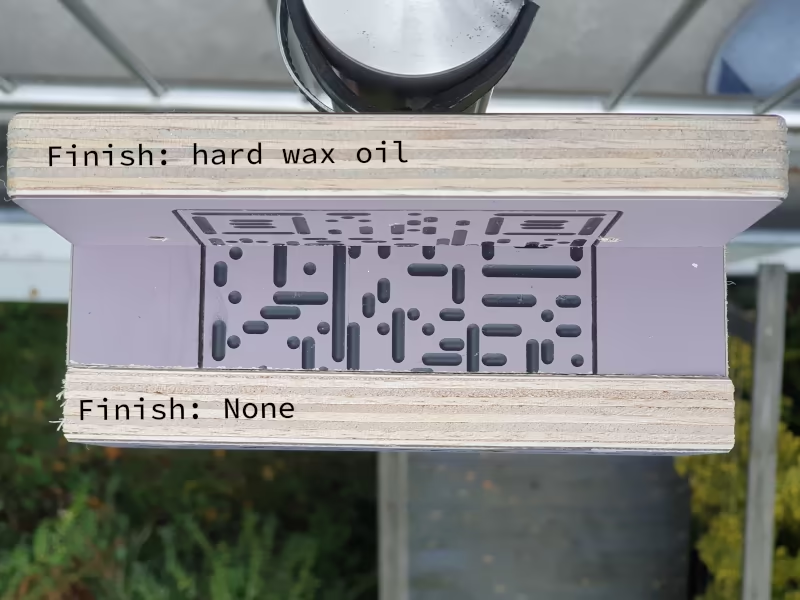
Even though the material was developed for interior construction, I’m currently testing the weather resistance of the panels with an experiment. I’m screwing the composite panels together at right angles, butting them together so that one side of the coating and the other side of the wood edge are directly exposed to the elements. I’ve sealed one exposed edge with hard oil and left the other untreated. Now I’m hanging the structure outside on the balcony for a year and will then see how the material behaves – an update will follow in a separate post!
My expectation: unlike birch plywood and similar to poplar wood, Albasia will not be suitable for outdoor use. I assume that the fibers in the edge area will absorb water and cause the material to swell. This would quickly lead to its decay. Furthermore, I consider the risk of insect infestation to be high because the fibers are really soft and can be easily peeled off. Therefore, I would only use it indoors.
Screw connections
Despite its light core, the Albasia composite panel is easy to screw together and, with a “screw pull-out strength of 120kg” for a 4mm wood screw, is in a “very stable range”, according to my dealer.
As a layperson I can’t make much sense of such figures, so I conduct a small experiment. I take a 4x35mm wood screw and look at the specified tightening torques. For my manufacturer, the following applies:
| Parameter | Value |
|---|---|
| Pull-out parameter fax,k | 14 N/mm² |
| Torsional strength ftor,k | 3 Nm |
| Screw-in torque Rtor,mean | ftor,k / Rtor,mean ≥ 1.5 |
| Pre-drilling in softwood | 2.5 mm |
| Pre-drilling in hardwood | 3 mm |
Now I’m checking if I can butt-join two boards with the specified tightening torque. For this, I’m using a torque screwdriver. But I don’t even get to the point where the mechanism engages: the screw starts to pull itself through the surface layer before that happens. I estimate the maximum torque before the screw “disappears” into the material to be only 0.8Nm.
Now I’m checking if I can butt-join two boards with the specified tightening torque.
Video: Trying to tighten a screw to the correct torque in wood.
This method certainly allows for stable screw connections, but I would always proceed carefully when tightening, use a generous number of screws, and additionally choose dowel or form-fitting connection methods.
Albasia on the CNC router
 Albasia can be processed with a CNC router like any other softwood. Problems typical of softwoods, such as tear-outs or fiber clusters, are to be expected here as well. In addition, the hard coating makes machining even more difficult due to different parameter selection requirements.
Which router bits are suitable for machining?
The material is challenging for the router bit. I had already had bad experiences with milling HPL in the article about overloading my router motor. However, the material at that time had a much higher proportion of hard paper fibers compared to Albasia composite (chips were light brown and interspersed with many “dots”), which blunted the router bit in record time.
I use solid carbide router bits with chip breaker and minimal helix (15°) to process the long wood fibers. Otherwise, they quickly clog the extraction system and accumulate around the router bit, which can pose a fire hazard.
For edge processing, I’ve had good experiences with compressive router bits like the quarter round bit. If you only plunge slightly into the material, a V-cut is also suitable. With a greater plunge depth, half-round “ball-nose” router bits achieve a nice milling finish.
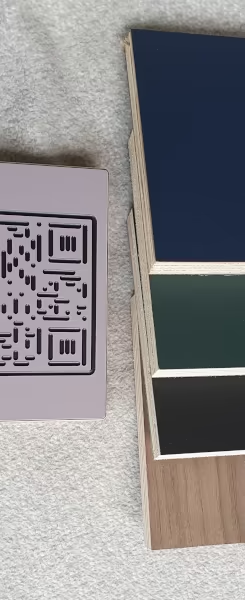
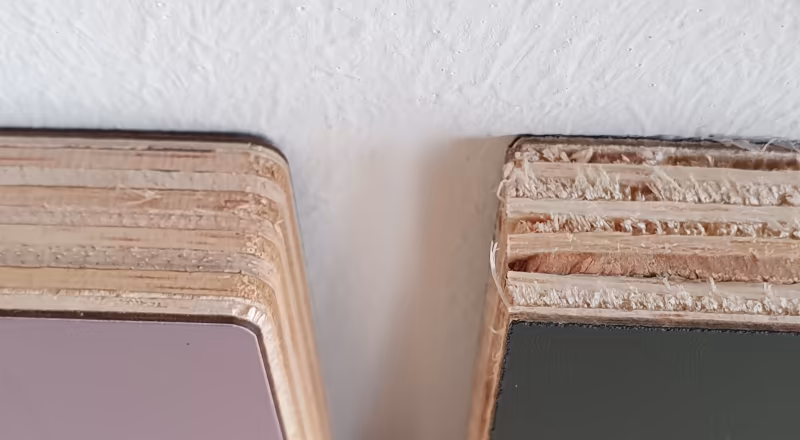
The image shows a comparison. On the right, the raw material has a green-gray coating, cut on a panel saw. On the left, in purple, is the workpiece I CNC-milled. The cutting pattern is clearly different and the surface machined with the milling cutter is much cleaner and without any tears.
If you’re using chipbreaking cutters in the full groove, it’s worth adding a finishing pass with a straight-toothed cutter and high feed rates with only a small infeed of 0.2mm.
All cutters must have the following in common:
- a cutting edge as sharp as possible (no coating!)
- a high cutting speed (don’t use diameters that are too small)
- a relatively high feed rate.
I was able to achieve a high surface quality with single-flute cutters. The large chip channel ensures good removal, but chipping can sometimes be problematic when single-passing with full engagement. The cutting load is quite high.
Which parameters?
Albasia is so soft that it offers little resistance to the milling machine’s axis drives. The cutting speed should be set high; online sources recommend around 500m/min as a guideline. I’ve tried feed rates up to 6000mm/min. As I only machined small workpieces, even higher feed rates would hardly offer any time advantage due to the constant changes in direction. An additional finishing pass is mandatory due to chipbreaker marks.
I’ve noted a good compromise between milling time and surface quality for various cutters below. However, I only use the engraving cutters in the HPL layer, which is why I reduce the feed and speed slightly.
| Tool (s = number of cutting edges) | Feed rate F [mm/min] | Speed S [rpm] | Z feed [mm] | XY feed [mm] |
|---|---|---|---|---|
| Solid carbide 2s chipbreaking 15° 6mm | 4200 | 24000 | 12 | 2.7 |
| Solid carbide 2s straight 6mm | 3700 | 26500 | 21 | 0.2 |
| Solid carbide V-cut 3s 90° 10mm | 3000 | 21000 | 0.27 | 0.1 |
| Solid carbide radius cutter 2s 6mm | 3000 | 21000 | 0.27 | 0.1 |
| Solid carbide quarter round 4s r2 6mm | 3600 | 15000 | 2 | 2 |
Finishing pass
The following video shows the finishing process after roughing a 145x145mm workpiece. Due to the small lateral infeed, hardly any fiber strings form, and the low feed rate ensures a very high surface quality despite the slight twist of the cutter.
CNC finishing of Albasia composite material
Engraving
With coated Albasia panels, engraving is ideally done in the top layer. If the material is not penetrating the substrate, problems with tearing and loose fibers can be avoided. Since the top layer is not very thick, the choice quickly falls on V-shaped cutters with an obtuse angle or a flattened tip.
Alternatively, pockets of 3D engravings can be cleared with end mills, if the CAM program offers such an option. This creates completely smooth “floors”. Alternatively, radius cutters can be used due to their gently rising geometry in the lower area. If the CAM program does not support 3D engraving with radius cutters, the cutter geometry can be approximated as described in the article Halftone Images on Dibond.
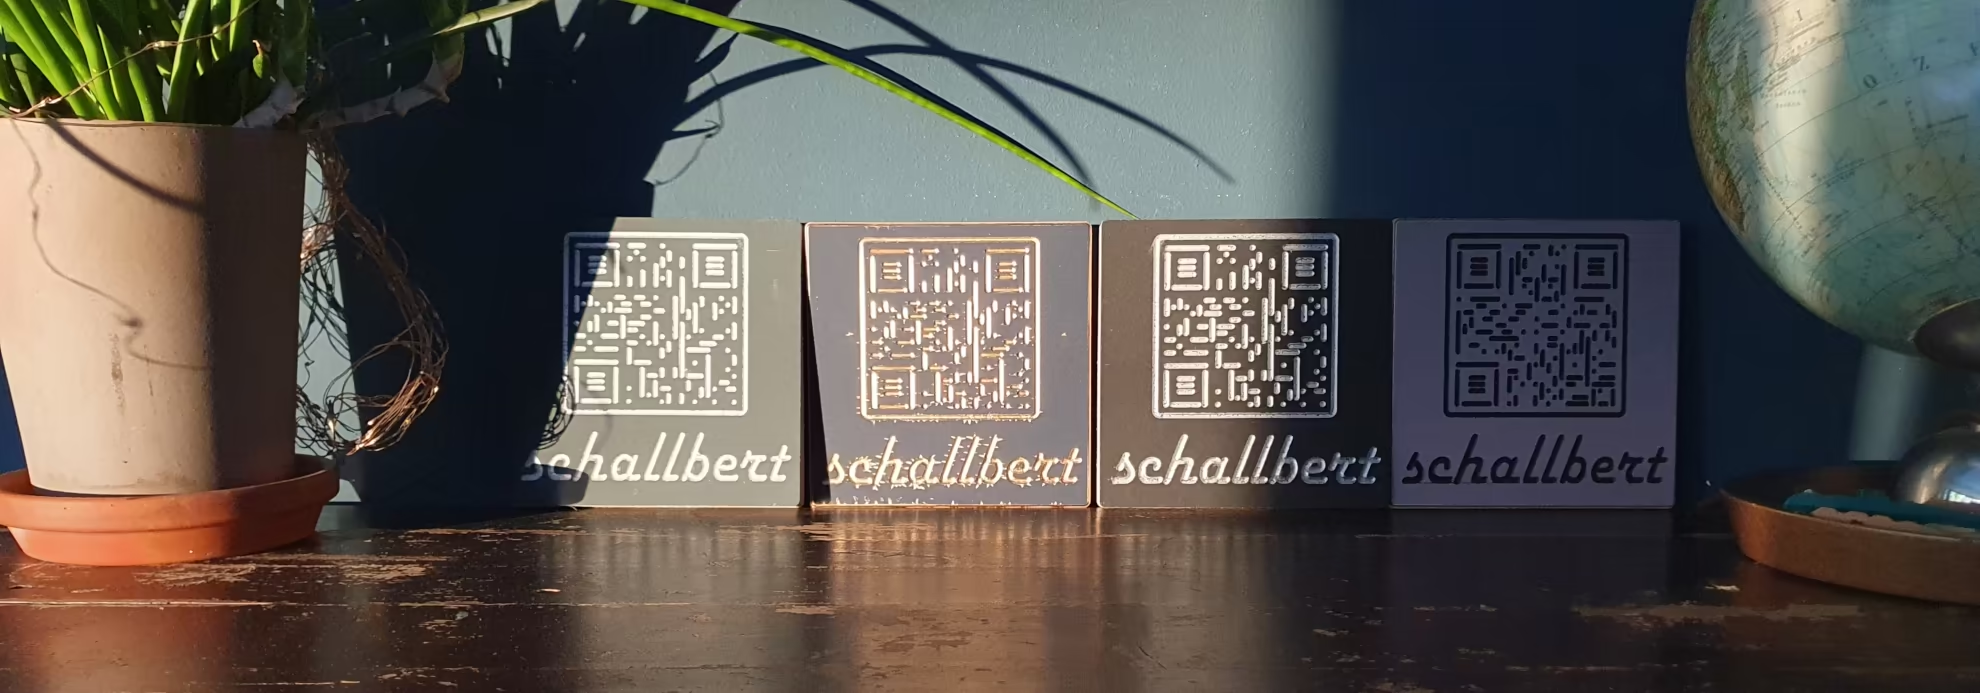
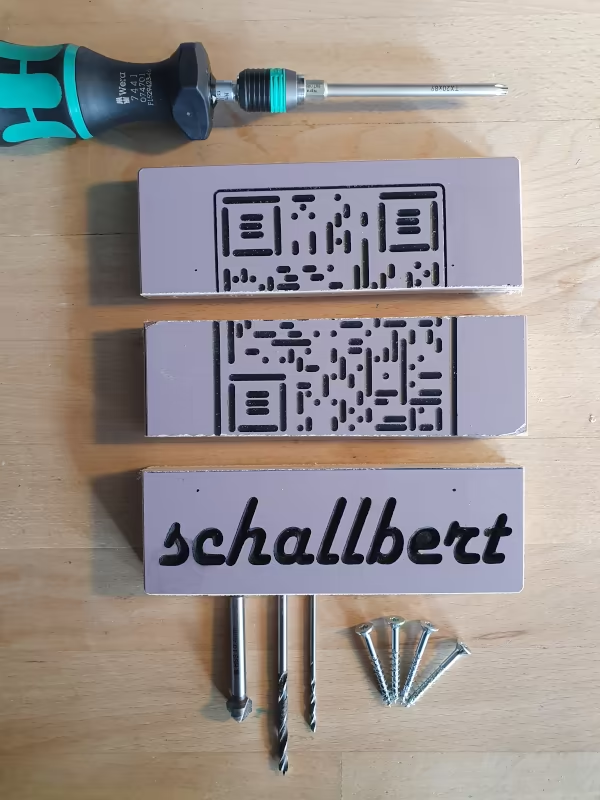
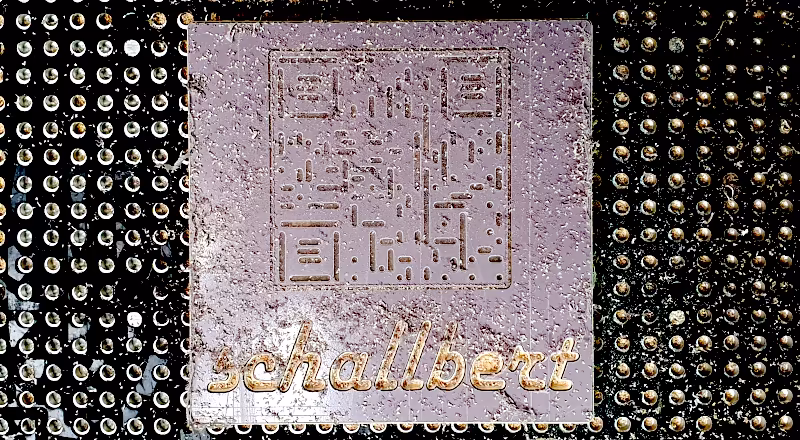
I have prepared two examples in the image below: The CR code in the upper half was created with a 6mm radius cutter at a 0.2mm plunge depth. The resulting dots and lines feel soft and pleasant thanks to the smooth transitions. The lettering in the lower half of the image was milled with an engraving cutter and a depth of up to 7mm. While this beautifully showcases the natural wood tone, small letter heights like this (max. 30mm) tend to cause breakouts in letters with “islands” (a, e, b, o, etc.).
Working with Color
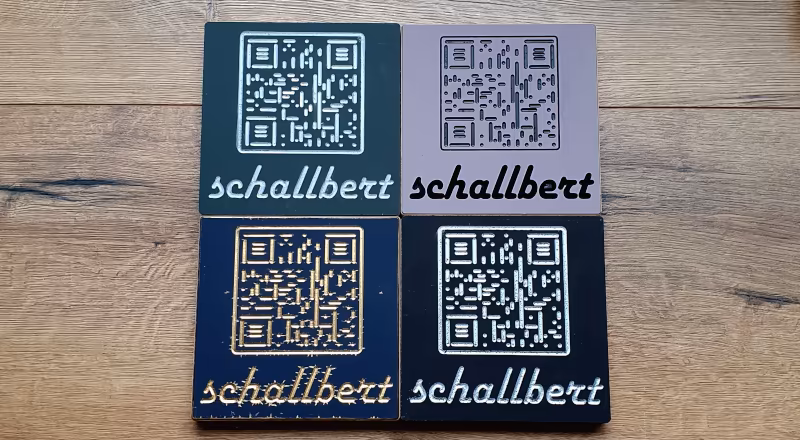
The contrast of the engravings is OK, but the legibility is far from perfect. Therefore, it makes sense to ink the engravings. I experimented with a few colors; you can see some impressions in the image below.
Which varnish?
The board comes with a protective film to protect the colored coating. This makes it super easy to apply spray paint if I leave the protective film on the workpiece for engraving. I used standard water-based acrylic varnish (top right), spray paint with metallic particles (below), and a solvent-based permanent marker (top left).
The varnishing process was easy. The abrasion resistance of the surfaces engraved in HPL is high with color applied. If you engrave through to the wood, the fibers will stand up slightly due to the varnishing, which is very time-consuming to correct later and not beneficial to the overall impression.
Please note: Protective film
The varnishing process should be started immediately after engraving, if possible, and not days or even weeks later. Otherwise, the protective film tends to peel off or bubble at the edges of the engraving, and the color is drawn into areas where it doesn’t belong by capillary action. Unfortunately, this visibly ruined the gold-blue version of my test series.
Conclusion: What is Albasia for?
All in all, I would consider Albasia to be one of the more docile materials for CNC machining, accepting a wide range of feed parameters while maintaining a high surface quality. A challenge is its tendency to form long fibers. Due to the gluing in the multiplex composite, poor quality of individual inner layers can become apparent late in the processing, which then leads to scrap and time wasted.
It’s also suitable as an engraving material, but the coating alone would be sufficient for this, and the small engraving depths place strict limits. Therefore, the engraving can at best be a nice addition to the actual use of the panels.
The coating makes the material quite suitable for furniture construction. If you work with concealed edges, I can even imagine it being used in the kitchen. Because it has high flexural stability and the coating’s impressive hardness, it’s a surface suitable for everyday use. The panel material is feather-light, making it ideal for mobile applications in visible areas.
However, it’s nowhere near as robust as birch plywood. I wouldn’t trust the material to withstand stressed joints; for bolted connections, I would maximize surface area and always use furniture connectors (i.e., avoid wood screws).