Image to Path
This is a short blog post about how to use the two Open-source tools Paint.NET and Inkscape to yield paths that can be used e.g. for engravings on a CNC machine, a laser cutter, or a plotter, even from a low-quality digital image in a lossy data compression format like JPEG.
It was inspired by this excellent Stackexchange thread.
Get the source image
Obtain the image you want to be working with on your machine.
Intellectual property
Note that images (even the ones you did draw yourself) are usually copyright protected so you must first get (written) approval from the owner of the intellectual property.
If the intellectual rights owner is you, that’s much more easy. This is why I chose an image I drew myself for this quick demo.
Image quality
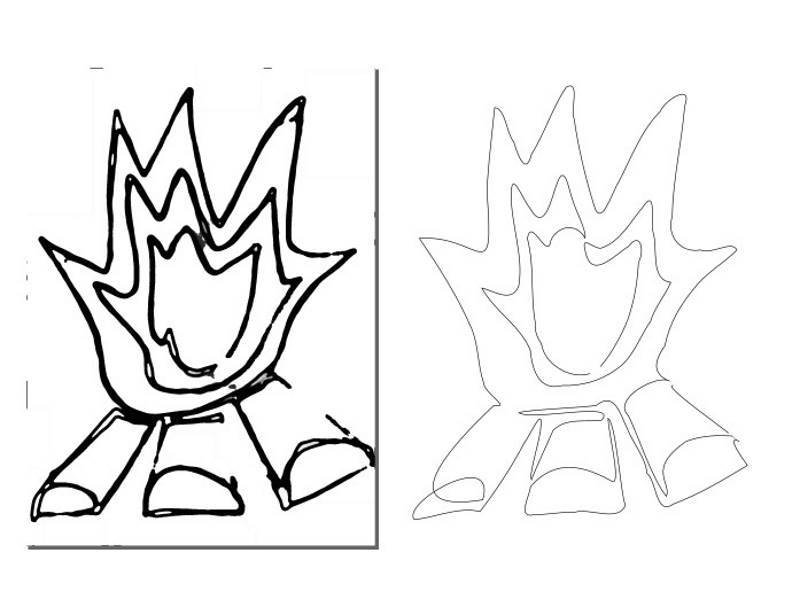
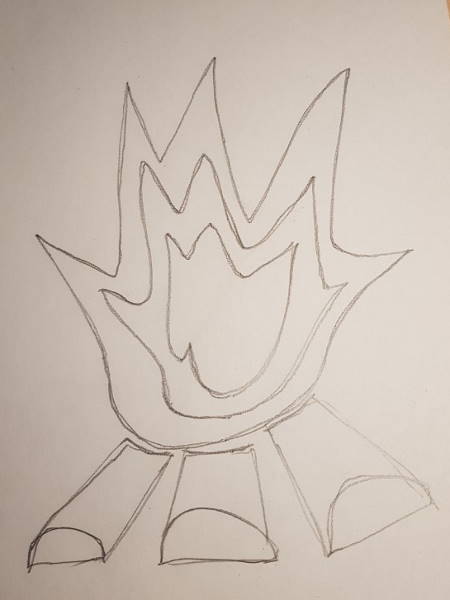
Look at how ugly it is. It really shows I’m not an artist. Some lines are drawn multiple times and the contrast is low. Perfect conditions to show what the software can do!
But remember: Pretty much as always, the credo is “Garbage in, garbage out”. So you should make sure you get the best possible image quality to start with. Cleaning the image will be much easier this way and your engraving paths will both be simpler and more accurate.
Paint.NET
Groundworks
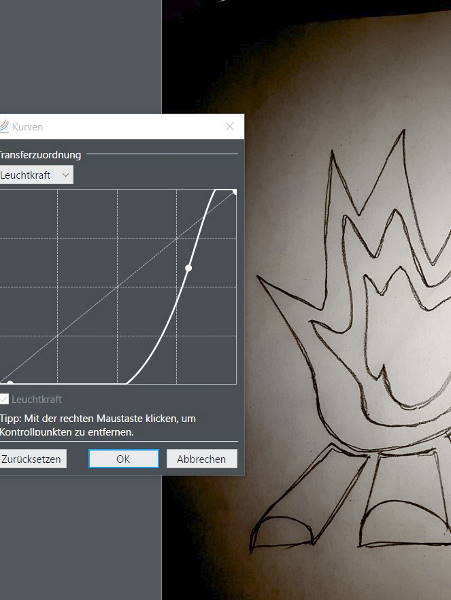
First, crop your image to the content you want to use later. Then take the luminance curve tool Adjustments -> Curves and try to separate highlights and dark tones as much as possible.
Second, if your image is as bad as mine, use the wand tool - play around with the tolerances - to knock out the background as well as possible.
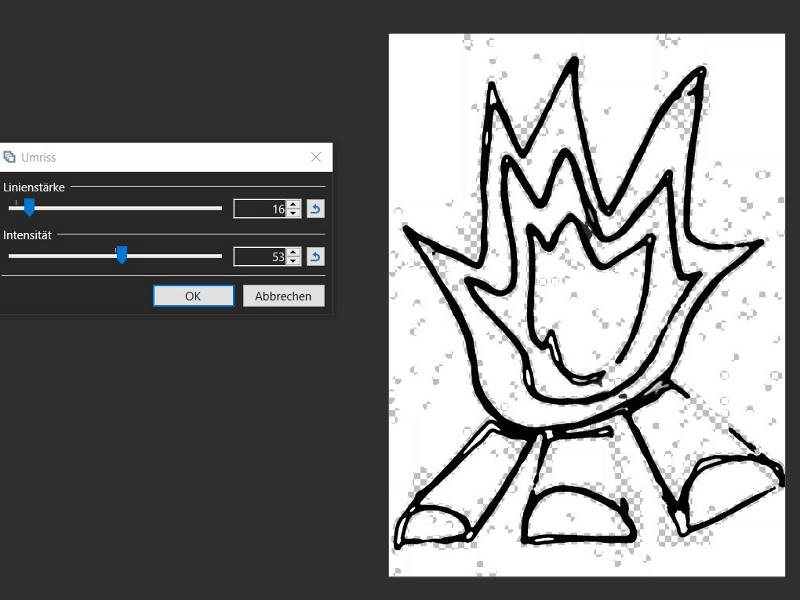
Third, use the outline tool (Effects -> Stylize -> Outline) to get a nice and thick line from your image. Desaturating the image could help along with another contrast increase to make this line black. In case you start “losing” lines that are not dark enough - don’t worry, that’s easy to fix later on in Inkscape.
Cleanup
Remove as many “pixel clouds” and other artifacts from the image as possible using wand or eraser tools, it’s easier to do now than later.
Save your image as portable network graphic .PNG
Inkscape
Open the image in inkscape. Chose standard import settings DPI from file etc.
Tracing
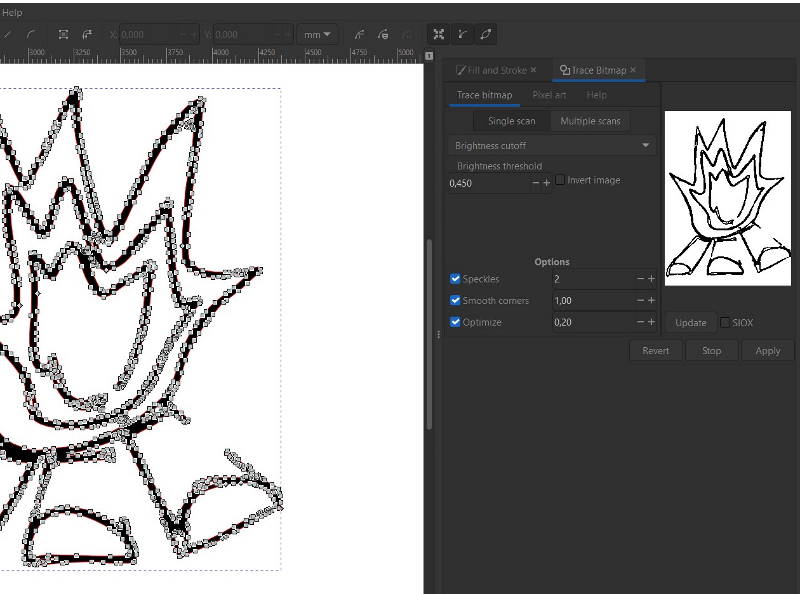
Select Path -> Trace Bitmap. In the new pane, select Trace Bitmap, Single Scan Brightness Cutoff, and play around with the options. Make sure you select the image via mouse click before clicking update or apply. If you’re not happy with the preview, adjust the cutoff values. In case you’re getting lost given the multitude of settings, just have a look at this tutorial by Inkscape.
OK, now you have a lot of paths. Click Path -> Simplify to reduce the number of supporting points. Then continue manually removing artifacts that sneaked back in via the Brightness cutoff with the Edit Paths by Nodes tool.
Fill and Stroke
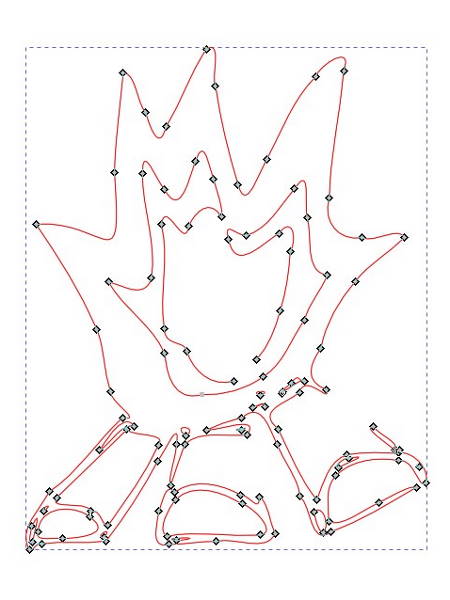
What we have now are two paths outlining the drawing on the outer and the inner, and a fill in between those paths that represents line strengh of the original drawing. As we want to keep the outer stroke / paths only, we’ll have to get rid of fill and inner line.
Select the Stroke and Fill tool in the lower part of the tool bar on the right. Select Stroke paint tab and set the stroke to Flat color. Under Stroke style, select a line width you’re comfortable with. Then go to Fill tab and set it to No paint. Now you’re only left with two outline paths of which you’re free to delete one if you wish.
Further cleanup
This looks pretty good already, doesn’t it? If you don’t mind having outlines more than a single stroke image, you’re done already. You could now further improve the image by pulling out paths or transforming curves. Or, if you want just a few lines to be cut, continue.
Use the break path at selected nodes tool before removing parallel lines so you don’t accidentally kill the lines you’d like to keep. Once you’re happy with the clean up and every wrinkle is ironed out, save your work as scalable vector graphic file .SVG.
That’s it! Now your CAM or any other machine toolchain you’re using can import the image (remember the DPI setting so your scaling remains valid).